Craft Win 10 Bootable USB Easily
Dive into the world of creating Win 10 bootable USB drives effortlessly with our step-by-step guide. No tech jargon here!
Table of Contents
Introduction: Crafting Your Own Windows 10 Bootable USB
Have you ever been in a situation where your Windows PC encountered a critical error, and you needed to reinstall the operating system? Or maybe you just got a new computer and want to set it up with the latest version of Windows? In these scenarios, having a Windows 10 bootable USB can be a lifesaver. But what exactly is a Windows 10 bootable USB, and why is it essential for your PC? Let's dive in and explore the world of creating your own Windows 10 bootable USB.
Essentially, a Windows 10 bootable USB is a portable device that contains all the necessary files to install or repair Windows 10 on your computer. It serves as a handy tool when your PC's operating system is acting up, and you need to reformat and reinstall Windows. Instead of using traditional installation discs, a bootable USB is more convenient and faster to set up.
So, imagine having the power to revive your Windows PC whenever it faces issues or having the flexibility to install Windows on a new computer without any hassle – that's the magic of a Windows 10 bootable USB. And the best part? You can easily craft one yourself with a few simple steps and the right tools. Stick with us as we walk you through the process of creating your very own Windows 10 bootable USB.
What You Need Before You Start
Before you dive into creating your very own Windows 10 bootable USB, there are a few essential items you'll need to have on hand. Let's go through them step by step.
Choosing the Right USB Drive
First and foremost, you'll need a USB drive to make your bootable device. Make sure to select a USB drive with a sufficient amount of space to accommodate the Windows 10 installation files. A drive with at least 8GB of storage is recommended to ensure everything fits without any issues.
Understanding Windows 10 Versions
When deciding which version of Windows 10 to install, you have two primary options: Windows 10 Home and Windows 10 Pro. The main difference between the two versions lies in the features they offer. Windows 10 Home is designed for everyday users, while Windows 10 Pro includes additional features suited for business and advanced users.
Downloading the Windows 10 Installation File
Before you can create a bootable USB for installing Windows 10 on your PC, you need to download the official Windows 10 installation file from the Microsoft website. Here's a simple guide to help you get started.
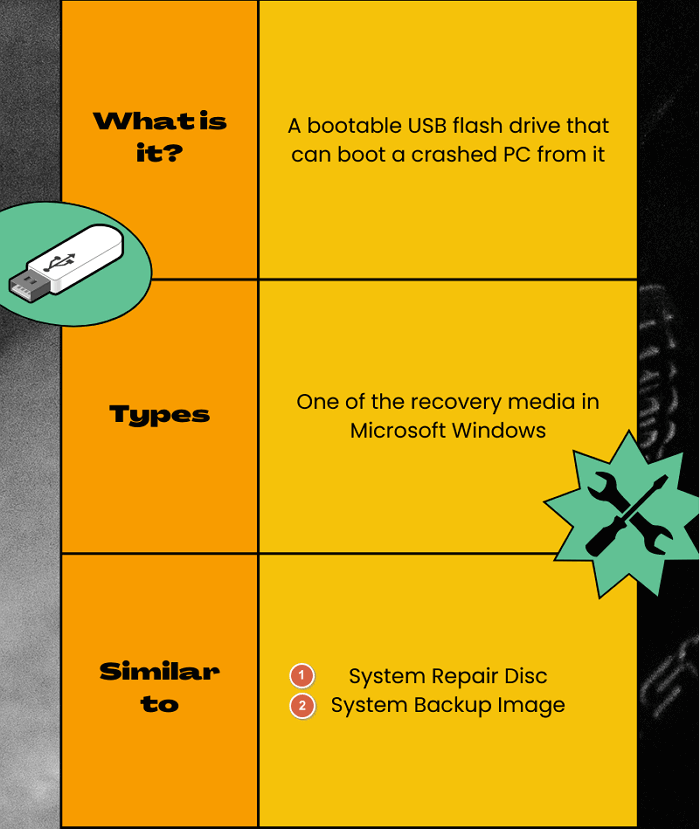
Image courtesy of www.easeus.com via Google Images
Navigating the Microsoft Website
First, open your web browser and go to the official Microsoft website. Look for the section dedicated to Windows 10 downloads. You can easily find it by searching for "Windows 10 download" on the website's search bar.
Selecting Your Windows Version
Once you're on the download page, you'll need to select the correct version of Windows 10. Microsoft offers different versions like Windows 10 Home and Windows 10 Pro. Choose the version that matches the product key you have for your PC.
After selecting the right version, click on the download button. The Windows 10 installation file will start downloading to your computer. Make sure to save it in a location where you can easily access it later.
Creating Your Bootable USB
Now that you have downloaded the official Windows 10 installation file, it's time to create your very own bootable USB. Follow these simple steps to get your USB drive ready for installing Windows 10 on your PC.
Using the Windows USB/DVD Download Tool
The first tool you can use is the Windows USB/DVD Download Tool provided by Microsoft. This tool makes it easy to copy the installation files to a USB drive, making it bootable. Simply download and install the tool on your computer, and then follow the on-screen instructions to create your bootable USB.
Making Sure Your USB is Bootable
Before you start the Windows 10 installation process, it's crucial to ensure that your USB drive is set up correctly to be bootable. Double-check that the installation files were successfully copied to the USB drive and that there are no errors present. This step is essential to avoid any issues during the installation.
Booting from the USB Drive
Now that you have successfully created your Windows 10 bootable USB drive, it's time to learn how to boot from it on your Windows PC. This process is crucial for installing or repairing your operating system. Here's how you can do it:
| Method | Pros | Cons |
|---|---|---|
| Using Windows Media Creation Tool | 1. Official Microsoft tool 2. User-friendly interface 3. Step-by-step instructions | 1. Requires stable internet connection 2. Can only create bootable USB for Windows 10 |
| Using Rufus | 1. Fast and efficient 2. Supports various operating systems 3. Customizable options | 1. Not an official tool 2. May be confusing for beginners |
| Using DiskPart Command | 1. Built-in Windows utility 2. Can be used without additional software | 1. Command-line interface 2. Requires careful attention to syntax |
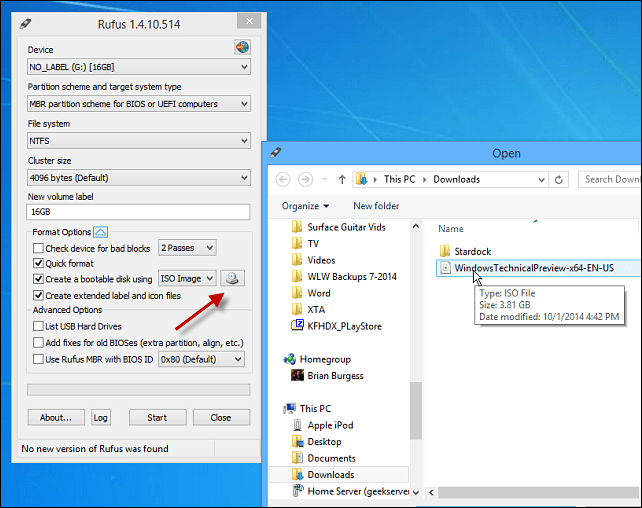
Image courtesy of www.groovypost.com via Google Images
Accessing the PC's BIOS/UEFI
Your PC's BIOS (Basic Input/Output System) or UEFI (Unified Extensible Firmware Interface) controls the startup process of your computer. To access it:
1. Start or restart your computer and look for a message that tells you how to enter the BIOS or UEFI settings. This message often appears on the screen during the boot process.
2. Common keys to access the BIOS or UEFI settings are Del, F2, F10, or Esc. Press the designated key repeatedly until you enter the settings.
Selecting the Bootable USB
Once you are in the BIOS or UEFI settings, you need to change the boot order to prioritize the USB drive. Follow these steps:
1. Navigate to the Boot or Boot Options menu using the arrow keys on your keyboard.
2. Look for the option that allows you to change the boot order or select a primary boot device.
3. Move the USB drive to the top of the boot order list using the designated keys (usually the + and - keys).
4. Save the changes and exit the BIOS/UEFI settings. Your computer will now restart.
By setting the bootable USB drive as the primary boot device, your computer will launch the Windows 10 installation process from the USB drive instead of the internal hard drive.
Troubleshooting Common Issues
Creating a Windows 10 bootable USB can sometimes run into bumps in the road. Here are some common issues and how to resolve them:
What If the USB Won't Boot?
If your PC doesn't recognize the USB drive or won't boot from it, don't panic. First, check if the USB is properly inserted into the port. Try plugging it into a different USB port to see if that resolves the issue. If it still doesn't work, you may need to change the boot order in the BIOS settings of your PC. Restart your computer and access the BIOS by pressing the appropriate key (often F2, F12, or Del) during startup. Look for the Boot Options menu and make sure the USB drive is set as the primary boot device. Save the changes and restart your PC to see if it boots from the USB now.
Error Messages During Installation
During the Windows 10 installation process, you may encounter Error messages that can be confusing. Some common errors include "Windows cannot be installed to this disk" or "Windows cannot be installed on this computer's hardware." These errors usually indicate compatibility issues with your hardware or disk partitioning. To resolve these errors, ensure that your computer meets the minimum System requirements for Windows 10. Check if the disk is properly formatted and if there are any conflicting software or drivers that might be causing the issues. If needed, consult online forums or Microsoft support for specific error messages to find solutions tailored to your situation.
Conclusion: Ready to Install Windows 10
Now that you have successfully created your own Windows 10 bootable USB, you are well-equipped to install or repair Windows on your PC with ease. Whether you have chosen Windows 10 Home or Windows 10 Pro, you have taken a significant step towards optimizing your computer's performance.
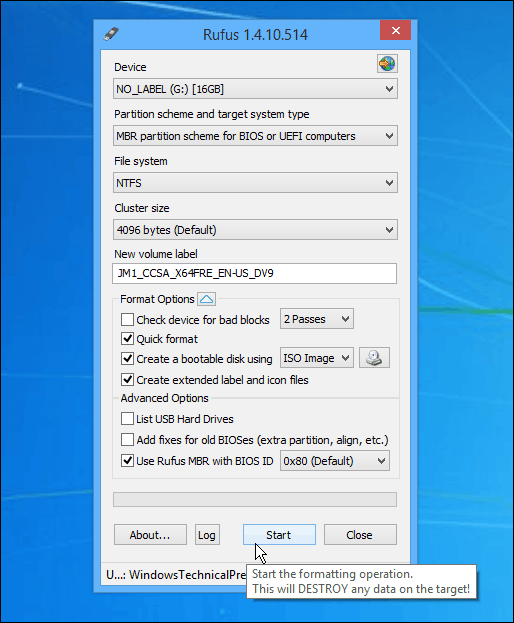
Image courtesy of www.groovypost.com via Google Images
By following the steps outlined in this guide, you have shown initiative and resourcefulness in managing your PC's operating system. With your bootable USB ready, you can confidently proceed with the installation process, knowing that you have the necessary tools at your disposal.
Installing Windows 10 can seem like a daunting task, but with your prepared bootable USB, you are one step closer to a seamless and efficient installation. Remember, if you encounter any issues during the installation process, refer back to this guide for assistance and troubleshooting tips.
FAQs
Providing answers to commonly asked questions to clarify any remaining doubts about the process.
Can I use the same USB to install Windows 10 on multiple PCs?
Yes, you can use the same bootable USB to install Windows 10 on multiple PCs. Once you have created the bootable device, you can use it to install Windows on any compatible computer. Just make sure to follow the proper steps for each PC to ensure a successful installation.
Do I need a separate license for Windows 10 Home and Pro?
Yes, you will need a separate license for Windows 10 Home and Pro. The Home and Pro versions of Windows 10 come with different features and functionalities, so you will need a specific license key for each version. Make sure you have the correct license key ready when you are installing Windows 10 using your bootable USB.


