Create a Win 10 Bootable USB
Unleash the power of flexibility with a Win 10 Bootable USB - your key to seamless computing on the go!
Table of Contents
We are going to learn about how to make your own Windows 10 bootable USB. This is something super cool that you can do to start your Windows computer in a brand new way! Imagine having a magic stick that helps your computer wake up and start properly. Let's dive in to discover how you can create this magical tool.
But before we get into the details, let's find out why having a Windows 10 bootable USB is important and how it can make your life easier with your Windows computer.
What is a Windows 10 Bootable USB?
A bootable USB is like a magic stick that helps your computer wake up and start properly. Let's find out why it's important and what it does!
The Magic Inside the Bootable USB
We'll talk about the magic recipe inside the USB that makes it bootable for Windows computers.
Gathering the Ingredients for our Magic Stick
Just like baking a cake, we need some ingredients to make our bootable USB. We'll look at what you need to start!
Choosing the Right Flavor of Windows 10
Windows 10 comes in different flavors like Windows 10 Home and Windows 10 Pro. We'll decide which one is best for you!
Getting a USB Stick
Finding the perfect USB stick that can become our magic stick is important. We'll talk about which one to pick.
How to Make Your USB Bootable
Now that we have all the ingredients ready, it's time to make our very own Windows 10 bootable USB. Don't worry, it's easy and fun! Follow along as I guide you through the steps one by one.
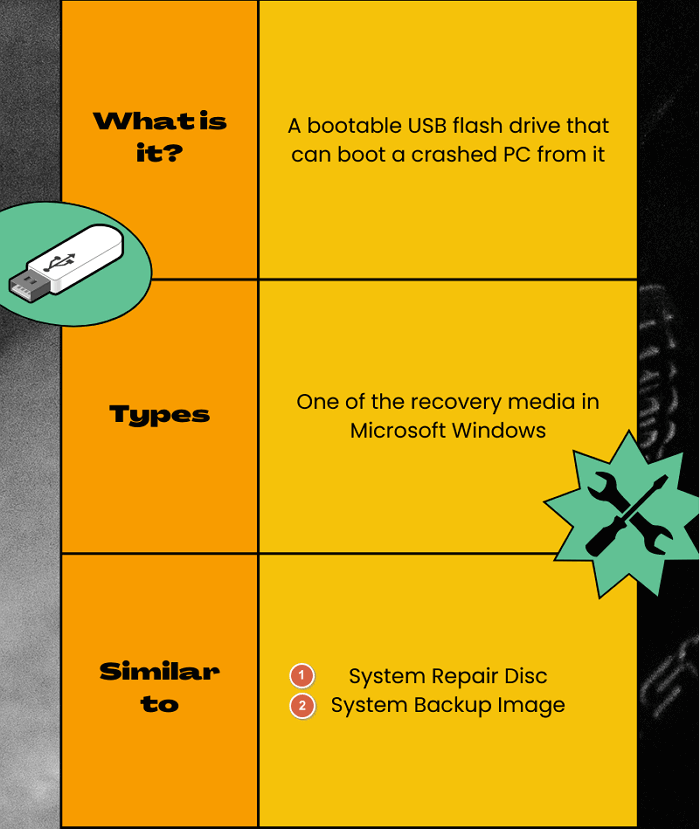
Image courtesy of www.easeus.com via Google Images
Downloading the Recipe from Microsoft
The first step is to get the Windows 10 setup from the Microsoft website. This setup file contains all the necessary ingredients to make our USB bootable. Let's head over to the Microsoft website and download the setup file to our computer.
Mixing the Ingredients Together
Once we have the setup file downloaded, we need to mix all the ingredients together to create our bootable USB. We'll be using a special tool that will help us do this. Follow the instructions on the screen to select the right options and let the tool do its magic.
Testing the Magic Stick
After creating our bootable USB, it's important to test it to ensure that it works like magic. Let's dive into how we can perform this essential step!
How to Tell if the USB is Bootable
Checking if your USB is bootable is quite simple. All you need to do is insert the USB stick into your computer and restart it. If your computer recognizes the USB and starts loading the Windows setup, then congratulations – your magic stick is ready to go!
Starting Your Computer with the Bootable USB
Now that we know our USB is bootable, let's learn how to use it to start up your Windows computer. Follow these steps:
1. Insert the bootable USB into an available USB port on your computer.
2. Restart your computer.
3. During the restart process, your computer will prompt you to press a key to boot from the USB. Follow the on-screen instructions to do so.
4. Windows setup will begin loading from the USB, and you can proceed with installing or repairing your operating system.
Voilà! Your computer will now start up using the magic stick you've created. It's like having a secret key to unlock a whole new world on your computer!
Keeping Your Magic Stick Safe
Just like any magic tool, we need to keep our Windows 10 bootable USB safe from dragons (problems) and dust (damages). Here are some tips on how to take good care of your magic stick:
| Step | Description |
|---|---|
| Step 1 | Download the Windows 10 ISO file from Microsoft's official website. |
| Step 2 | Insert a USB drive with at least 8GB of storage capacity into your computer. |
| Step 3 | Download and install a free tool like Rufus or Balena Etcher to create a bootable USB drive. |
| Step 4 | Open the tool and select the Windows 10 ISO file you downloaded in Step 1. |
| Step 5 | Choose the USB drive you inserted in Step 2 as the destination for the bootable USB. |
| Step 6 | Click on the 'Start' or 'Create' button to begin the process of creating a bootable Windows 10 USB drive. |
| Step 7 | Once the process is completed, safely eject the USB drive from your computer. |
| Step 8 | Your Windows 10 bootable USB drive is now ready for use. You can use it to install or repair Windows 10 on your computer. |
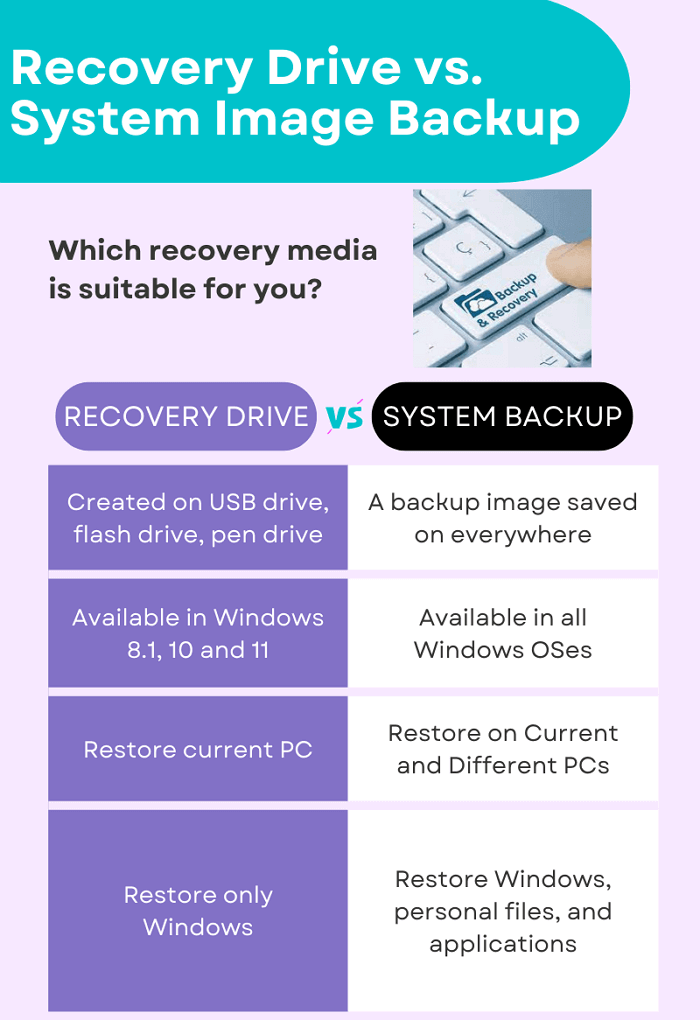
Image courtesy of www.easeus.com via Google Images
Protecting Your USB from Dragons (Problems)
Dragons in this case are problems like viruses or corrupted files that can sneak into your USB and make it not work properly. To keep your magic stick safe:
- Regularly scan your USB with an antivirus program to protect it from viruses.
- Backup your important files from the USB to your computer to prevent data loss in case of a problem.
- Avoid using your bootable USB on unfamiliar or questionable computers to reduce the risk of picking up problems.
Shielding Your USB from Dust (Damages)
Dust can cause physical damage to your USB stick, making it harder for the magic inside to work. To keep your magic stick safe from dust:
- Store your bootable USB in a protective case when not in use to shield it from physical harm.
- Avoid bending or dropping your USB, as this can damage the internal components and make it unusable.
- Clean the USB connector carefully with a soft, dry cloth to remove any dust or debris that could interfere with its functionality.
Summary
Today, we embarked on a journey to create our very own Windows 10 bootable USB stick. This magical tool acts as a key to unlock your computer and start it in a whole new way. Let's recap what we've learned and accomplished together.
Understanding the Magic Stick
We delved into the world of bootable USB sticks and discovered how they work their magic by helping your computer start up properly. Now, you know why having one is essential!
Gathering the Ingredients
Just like baking a cake, we gathered our ingredients for the magic stick, including choosing the right version of Windows 10, whether it's Home or Pro, and selecting the perfect USB stick to transform into our magic wand.
Making Your USB Bootable
With the ingredients in hand, we followed step-by-step instructions to download the Windows 10 setup from Microsoft and mix everything together using a special tool to create our bootable USB stick.
Testing Your Magic Stick
After creating our bootable USB, we conducted tests to ensure our magic stick was ready to use. We explored how to check if the USB is bootable and how to start up your computer using it.
Keeping Your Magic Stick Safe
Just like any magical artifact, it's crucial to keep your bootable USB safe from dangers like dragons (problems) and dust (damages). Remember to store it properly and handle it with care.
Now that we've covered the basics of creating a Windows 10 bootable USB stick, you are equipped with a powerful tool to troubleshoot and start your computer when needed. Congratulations on mastering this essential skill!
FAQs
Can I use my magic stick on different computers?
When you create a Windows 10 bootable USB, it's usually meant to be used on the same computer or a similar one. Each computer has its own special preferences, so using the same magic stick on different computers might not work as expected. It's like having a special key that fits one lock perfectly but doesn't quite work on another. So, it's best to create separate bootable USBs for each computer to ensure the magic works smoothly!
What if my computer doesn't start with the bootable USB?
If you've followed all the steps to create your bootable USB but your computer still doesn't start up using it, don't worry! Sometimes computers can be a bit picky. First, double-check that you correctly followed all the steps, like downloading the Windows 10 setup and mixing the ingredients together properly. If everything seems right but your computer still doesn't start, you might need to adjust some settings in your computer's BIOS. This is like giving your computer a little nudge in the right direction to recognize your bootable USB. If you're not sure how to do this, you can always ask a grown-up for help!


