Create Bootable Win 10 USB Guide

Discover the step-by-step guide to creating a bootable Win 10 USB - a must-read for all tech enthusiasts!
Table of Contents
Introduction to Creating a Bootable Windows 10 USB
Welcome to a super cool guide on how to make your very own bootable USB stick that has Windows 10 on it! This is like a magic stick that helps you put Windows 10 onto a computer. Exciting, right?
What is a bootable USB?
A bootable USB is like a key that lets a computer start up and install Windows 10, even if it doesn’t have it yet. It's basically a special tool that helps give a computer a fresh start with Windows 10.
Why do you need a bootable USB?
Sometimes a computer needs a new brain (like Windows 10), and this USB stick is one way to give it that fresh start. It's handy to have one of these USB sticks around to help rescue a computer in need of a Windows 10 boost.
Materials Needed
Before you start, you'll need a few things to make your bootable USB stick.
A USB Stick
You will need a USB stick, like the kind you use for saving your school projects, but it has to be empty and have enough space. This stick will hold all the important Windows 10 files to help a computer start fresh.
A Windows PC
You will also need a computer that’s working and can connect to the internet to get Windows 10. It’s like having a friend who can help you get the new brain (Windows 10) for another computer.
Downloading Windows 10
Let’s find out how to get Windows 10 onto your USB stick! It's like giving your USB stick superhero powers to help a computer start fresh and new again.
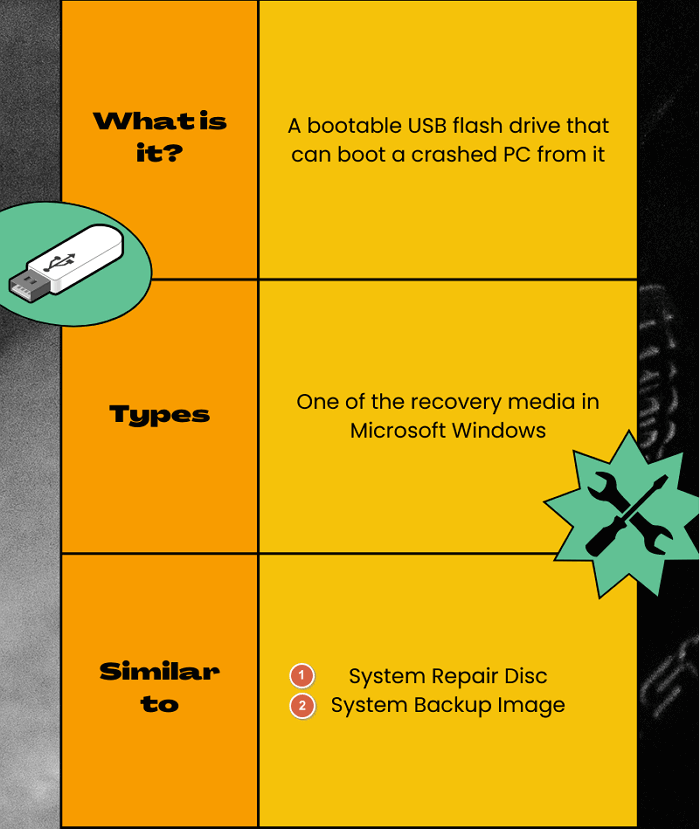
Image courtesy of www.easeus.com via Google Images
Visit the Microsoft Website
First things first, grab an adult and head to the Microsoft website. There, you can download Windows 10. Don't worry, it's safe and easy! Just follow the instructions and you'll have Windows 10 in no time.
Preparing Your USB Stick
Next, let’s get your USB stick ready to do its magic.
Formatting the USB Stick
This means making sure the USB stick is clean and ready for Windows 10. Think of it like making your bed all neat before bedtime.
Setting Up the Bootable USB
Now we're going to put the Windows 10 we got into the USB stick so it can do its job later on another computer.
| Step | Description |
|---|---|
| 1 | Download the Windows 10 ISO file from the official Microsoft website. |
| 2 | Insert a USB drive with at least 8GB of storage capacity into your computer. |
| 3 | Open the Windows USB/DVD Download Tool and select the Windows 10 ISO file. |
| 4 | Choose the USB drive as the destination for the Windows 10 installation files. |
| 5 | Click "Begin Copying" to start creating the bootable Windows 10 USB drive. |
| 6 | Once the process is complete, safely eject the USB drive from your computer. |
| 7 | You can now use this bootable Windows 10 USB drive to install or repair Windows 10 on any compatible device. |
Transferring Windows 10 to the USB Stick
This step will show you how to move Windows 10 onto the USB stick now that it’s ready.
Image courtesy of www.easeus.com via Google Images
Using the Downloaded Files
Now that you have downloaded Windows 10, it's time to transfer it to your USB stick. Find the Windows 10 file you downloaded on your computer. It might be in your downloads folder or wherever you saved it. Once you locate the file, you can start transferring it to the USB stick.
Making the USB Stick Bootable
We’re in the homestretch! Let’s turn your USB into a magic key to install Windows 10.
When we say "bootable," we mean that your USB stick will have the special power to help a computer start up and get Windows 10 installed. It's like giving your USB stick a superhero cape!
But how do we give it this superpower? It's simpler than you might think!
First, you have to make sure that the Windows 10 files you put on your USB stick are set up in a way that the computer can understand and use them to start the installation process. This step is like teaching your USB stick how to do its magic trick correctly.
Do not worry, though! We will guide you through the process step by step, making sure your USB stick is all set to work its magic on any computer that needs Windows 10.
Final Steps and Testing
Before you finish up, double-check that everything you need is safely stored on your USB stick. This includes all the important Windows 10 files that will help a computer start fresh!
Image courtesy of www.easeus.com via Google Images
Testing the Bootable USB
Now comes the exciting part - testing your bootable USB stick! It's like a practice game to see if your USB can work its magic on another computer. Just plug it into a computer, turn it on, and see if Windows 10 starts up. If everything goes smoothly, you've done a fantastic job creating your very own bootable Windows 10 USB!
Conclusion
Congratulations! You've successfully created your very own magical Windows 10 USB stick that can help any computer start fresh with a new brain. It's like having a superpower in your pocket! Just remember, if you ever find yourself stuck or things get a bit tricky, don't hesitate to ask an adult for help. They'll be more than happy to guide you through any bumps along the way.
Frequently Asked Questions (FAQs)
What if my USB stick doesn't have enough space?
If your USB stick doesn't have enough space, you might need to get a bigger one with more room for all the important Windows 10 stuff. Just like a backpack that can't fit all your school stuff, a small USB stick won't be able to hold Windows 10.
Can I use my bootable USB stick on any computer?
Yes, you can use your bootable USB stick on any computer, but make sure the computer's family (like its brand) is okay with booting from a USB. It's like asking if you can wear your favorite shoes to any party – you want to make sure it's allowed and works well with the computer!


