Install Win 11 on Surface Studio

Discover the step-by-step guide to installing Windows 11 on your Surface Studio - say goodbye to outdated software today!
Table of Contents
Welcome to the Windows World!
Welcome, young tech enthusiast, to the exciting world of Microsoft Windows where endless possibilities await! Today, we're diving into the realm of Windows 11 Pro and exploring the wonders it can bring to your trusty Windows PC. Buckle up because the journey to a better Windows experience is about to begin!
What is Windows 11 Pro?
Picture this: Windows 11 Pro is like giving your Windows PC a shiny new makeover with a bunch of awesome features that are bound to make you say, "Wow!" It's like upgrading your favorite game to the deluxe version with bonus levels and power-ups. From a fresh new look to improved performance, Windows 11 Pro is here to take your computing experience to the next level. So, are you ready to take the leap and join the Windows 11 Pro party?
Checking Compatibility
Before you jump into installing Windows 11 on your Microsoft Surface Studio, it's crucial to ensure that your device is compatible with this new operating system. Compatibility issues can cause hiccups during the installation process, so let's check if your Surface Studio is ready for Win 11.
How to Check?
To determine if your Microsoft Surface Studio can support Windows 11, follow these simple steps:
- Go to the official Microsoft website and look for the system requirements for Windows 11.
- Check if your Surface Studio meets the minimum requirements for RAM, processor, storage, and graphics card.
- Run the PC Health Check tool provided by Microsoft to automatically check your device's compatibility with Windows 11.
- If your Surface Studio passes all the compatibility checks, you're good to go! If not, you may need to consider upgrading certain components to make it compatible.
By verifying the compatibility of your Microsoft Surface Studio with Windows 11 before the installation process, you can ensure a smooth and successful upgrade without any unexpected issues.
Preparing for Installation
Before you start the exciting journey of installing Windows 11 on your Windows 10 Pro PC, it's crucial to back up all your important files. Backing up means creating a copy of your files in another safe place, like an external hard drive or cloud storage. This way, if anything goes wrong during the installation process, you won't lose your precious photos, videos, or documents!

Image courtesy of www.microsoft.com via Google Images
Update Your Windows 10 Pro
Make sure to update your Microsoft Windows 10 Pro to the latest version before moving on to Windows 11. Updating your current Windows system will help ensure a smoother transition to Windows 11 and will also fix any bugs or security issues in your existing operating system. It's like making sure your car is running smoothly before embarking on a long road trip!
Let's Install Windows 11 Pro!
Are you ready to take your Windows PC experience to the next level with Windows 11 Pro? Let's dive into the exciting process of installing this upgraded operating system on your device!
Step-by-Step Installation
Installing Windows 11 Pro is a breeze! Here's a simple guide to walk you through the process:
1. Begin by ensuring your Microsoft Surface Studio is plugged in and connected to a power source. You don't want your device to run out of battery during the installation!
2. Next, click on the Start menu and select Settings. From there, choose Update & Security.
3. Look for the Windows Update option and click on Check for Updates. If Windows 11 Pro is available for your device, you'll see an option to download and install it. Click on that option to begin the process.
4. Your Surface Studio will now start downloading Windows 11 Pro. This may take some time, depending on your internet speed.
5. Once the download is complete, your device will begin installing Windows 11 Pro. Sit back and relax while your Surface Studio goes through the installation process. It may restart a few times, but that's perfectly normal.
6. Voila! You now have Windows 11 Pro installed on your Microsoft Surface Studio. Enjoy exploring all the new features and improvements this operating system has to offer!
With these simple steps, you can upgrade to Windows 11 Pro and experience a whole new world of possibilities on your trusted Windows PC. Get ready to unleash the power of Windows 11 Pro!
After the Upgrade
So, you've successfully upgraded your Windows PC to Windows 11 Pro. Now what? Let's explore what happens after the installation process is complete and how you can start enjoying all the exciting features of Windows 11 Pro.

Image courtesy of www.insight.com via Google Images
First Steps with Win 11
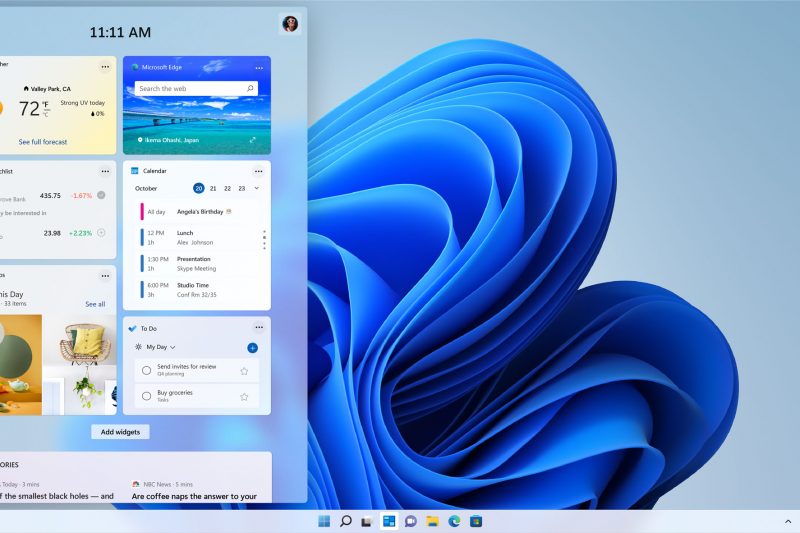
Once the upgrade is finished, you'll be greeted by the fresh and modern interface of Windows 11 Pro. Take a moment to explore the new Start menu, which now sits at the center of your screen, making it easier to access your favorite apps and files. You'll also notice the newly designed Taskbar, providing a more streamlined user experience.
One of the standout features of Windows 11 Pro is the ability to create virtual desktops, allowing you to organize your work and play spaces more efficiently. To create a new virtual desktop, simply click on the Task View button on the Taskbar and select "New Desktop." This feature can be especially handy for multitasking and keeping your desktop clutter-free.
Another exciting addition to Windows 11 Pro is the integration of Microsoft Teams directly into the operating system. This means you can easily connect with friends, family, or colleagues through video calls, chat, and shared tasks right from your desktop. To access Microsoft Teams, simply click on the chat icon on the Taskbar and start communicating with your contacts.
As you navigate through the various features of Windows 11 Pro, don't forget to personalize your experience by changing themes, customizing your desktop background, and adjusting settings to suit your preferences. Whether it's choosing a dark mode theme or tweaking color accents, make Windows 11 Pro your own.
Now that you've familiarized yourself with some of the basics of Windows 11 Pro, it's time to dive deeper into all the exciting possibilities this operating system has to offer. Explore new apps and features, stay connected with others, and enjoy a more intuitive and polished user experience with Windows 11 Pro.
Troubleshooting Tips
When you're installing Windows 11 on your Microsoft Surface Studio, things might not always go as smoothly as planned. But don't worry, we've got you covered with some troubleshooting tips in case you encounter any issues.
Common Issues and Their Fixes
If your installation hits a roadblock, here are some common problems you might encounter and simple ways to fix them:
1. Compatibility Check: If your Surface Studio isn't compatible with Windows 11, make sure to update all your drivers and firmware. Sometimes, updating these can resolve any compatibility issues.
2. Installation Errors: If you're having trouble installing Windows 11, try restarting your device and running the installation process again. Sometimes a simple reboot can do the trick.
3. Slow Installation: If the installation is taking longer than expected, be patient. Sometimes updates can be a bit slow, especially if you're working with a slow internet connection. Give it some time to complete.
4. Error Messages: If you see any error messages during the installation process, jot down the error code and search for solutions online. Often, others have encountered the same issue and found a fix.
5. Backup Failure: If you can't back up your data before installing Windows 11, consider transferring important files to an external storage device manually. It's always good to have a copy of your files in case something goes wrong.
By following these troubleshooting tips, you can navigate any bumps along the road to upgrading your Microsoft Surface Studio to Windows 11 like a pro!
Wrapping Up!
Installing Windows 11 Pro on your Microsoft Surface Studio can bring a whole new level of excitement to your computing experience. Remember, this upgrade is all about enhancing your device's performance and unlocking new features. Here's a quick roundup of what we've covered:
| Step | Description |
|---|---|
| 1 | Ensure your Surface Studio meets the minimum requirements for Windows 11. |
| 2 | Backup all important data on your Surface Studio before starting the installation process. |
| 3 | Download the Windows 11 installation media from the official Microsoft website. |
| 4 | Insert the installation media into a USB drive or disk and restart your Surface Studio. |
| 5 | Follow the on-screen instructions to begin the installation process of Windows 11. |
| 6 | Customize your settings and preferences during the installation process. |
| 7 | Wait for the installation to complete and restart your Surface Studio. |
| 8 | Set up your Windows 11 account and start using your Surface Studio with the new operating system. |

Image courtesy of news.microsoft.com via Google Images
Compatibility is Key
Before diving into the installation process, it's crucial to check if your Microsoft Surface Studio is compatible with Windows 11. This ensures a smooth transition without any hiccups along the way.
Prep Work Pays Off
Backing up your important files and updating your current Windows 10 Pro version are essential steps that ensure your data is safe and your system is ready for the upgrade. These preparatory measures pave the way for a seamless installation process.
Smooth Installation Journey
Following the step-by-step guide for installing Windows 11 Pro on your Windows PC will ensure a hassle-free experience. From the initial setup to the final touches, make sure to pay attention to each step to enjoy the benefits of the new operating system.
Post-Installation Thrills
Once the installation is complete, you can start exploring the exciting world of Windows 11 Pro. Take your time to familiarize yourself with the new interface and features to make the most of your upgraded system.
Troubleshooting Tips at Hand
If you encounter any issues during the installation process, don't panic. Refer back to our troubleshooting tips to quickly resolve common problems and get back on track with your Windows 11 Pro upgrade.
With these key points in mind, you're all set to embark on your journey to Windows 11 Pro on your Microsoft Surface Studio. Enjoy the enhanced performance and features that come with this exciting upgrade!
FAQs
Can I upgrade my Microsoft Surface Studio to Windows 11 Pro?
Yes, you can upgrade your Microsoft Surface Studio to Windows 11 Pro. However, it is important to first check the compatibility of your device with the new operating system to ensure a smooth transition.
What are the benefits of upgrading to Windows 11 Pro from Windows 10 Pro?
Upgrading to Windows 11 Pro brings a range of exciting features and improvements to your Windows PC. These include a redesigned user interface, increased productivity with virtual desktops, and enhanced gaming capabilities with DirectStorage technology.
Do I need to back up my files before installing Windows 11 Pro?
Yes, it is highly recommended to back up all your important files before installing Windows 11 Pro. This ensures that your data is safe in case of any unexpected issues during the upgrade process.
Will I lose any data during the upgrade process?
While upgrading to Windows 11 Pro should not result in any data loss, it is always a good practice to back up your files as a precautionary measure. This way, you can avoid any potential risks and ensure that your data remains secure.
What should I do if I encounter problems during the installation of Windows 11 Pro?
If you encounter any issues during the installation of Windows 11 Pro on your Microsoft Surface Studio, you can refer to the troubleshooting tips provided in the article. These common problems and their solutions can help you overcome any hurdles and successfully complete the upgrade process.


