Make Win 11 Bootable USB Easily
Discover the simple step-by-step process to make a Windows 11 bootable USB drive in just a few minutes!
Table of Contents
Hey there, curious minds! Today, we're going to dive into the exciting world of creating a special USB that can kickstart Windows 11 on a computer. It's like having a superpower in your pocket! So, get ready to unlock the magic of technology with us.
Have you ever thought about how cool it would be to have a tiny device that can bring a whole operating system to life on a computer? Well, that's exactly what we're going to learn about – making a Windows 10 bootable USB to launch Windows 11. Sounds awesome, right?
What is a Bootable USB?
A bootable USB is like a key that lets your computer start Windows 11. Imagine a tiny stick can hold the whole Windows 11 for your computer. We use this magic stick to put Windows 11 on a computer or fix it if it's not happy.
USB Stick and Windows 11
Imagine a tiny stick can hold the whole Windows 11 for your computer.
Why Use Bootable USB?
We use this magic stick to put Windows 11 on a computer or fix it if it's not happy.
Before You Begin
Here's what you need before making your bootable USB stick.
Gather Your Tools
First things first, find a USB stick and a computer with Windows 10 or 11. You'll need these to make your special USB that can start Windows 11 on a computer.
Pick the Right USB Stick
Make sure your USB stick is big enough to hold Windows 11. Just like you need a big enough backpack to carry all your school books, your USB stick needs to have enough space for Windows 11 to fit!
Making Your Bootable USB
Now let's make our bootable USB stick step by step.
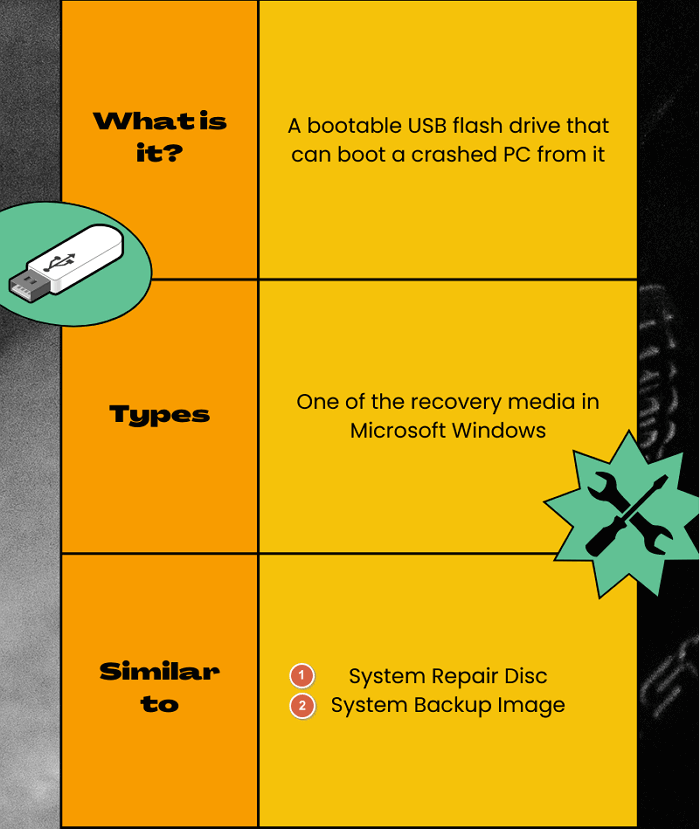
Image courtesy of via Google Images
Download Windows 11
First, we have to get Windows 11 from the internet. This is like getting the special potion to make our USB stick magical.
Use the Creation Tool
A special program helps us put Windows 11 on the USB stick. It's like a magic wand that waves over the USB stick, making it ready to start a computer.
Testing Your Bootable USB
After we make the USB stick, we need to check if it works. Let's see how we can test our bootable USB to make sure it's ready to start Windows 11 on a computer.
Try It on a Computer
The first thing we need to do is try our bootable USB stick on a computer. Insert the USB into a computer that you want to start with Windows 11. Then, turn on the computer and see if it starts up using the USB stick. If you see the Windows logo popping up, congratulations, your bootable USB is working perfectly!
| Step | Description |
|---|---|
| 1 | Download the Windows 11 ISO file from the official Microsoft website |
| 2 | Insert a USB drive with at least 8GB of storage capacity into your computer |
| 3 | Download and install a Windows USB/DVD Download Tool or Rufus software |
| 4 | Launch the software and select the Windows 11 ISO file you downloaded |
| 5 | Choose the USB drive you inserted as the destination for creating the bootable USB |
| 6 | Start the process and wait for the software to create the bootable USB drive |
| 7 | Once completed, safely eject the USB drive and use it to boot your computer with Windows 11 |
What if It Doesn't Work?
Don't worry if the computer doesn't start using your bootable USB. It's okay! You can try making the bootable USB again by following the steps we learned earlier. If you're not sure what to do, it's always a good idea to ask an adult for help. They can guide you through the process and make sure everything works smoothly.
Keeping Your Bootable USB Safe
Our bootable USB is very important because it helps us start Windows 11 on a computer. Let's learn how to keep it safe and in good condition.
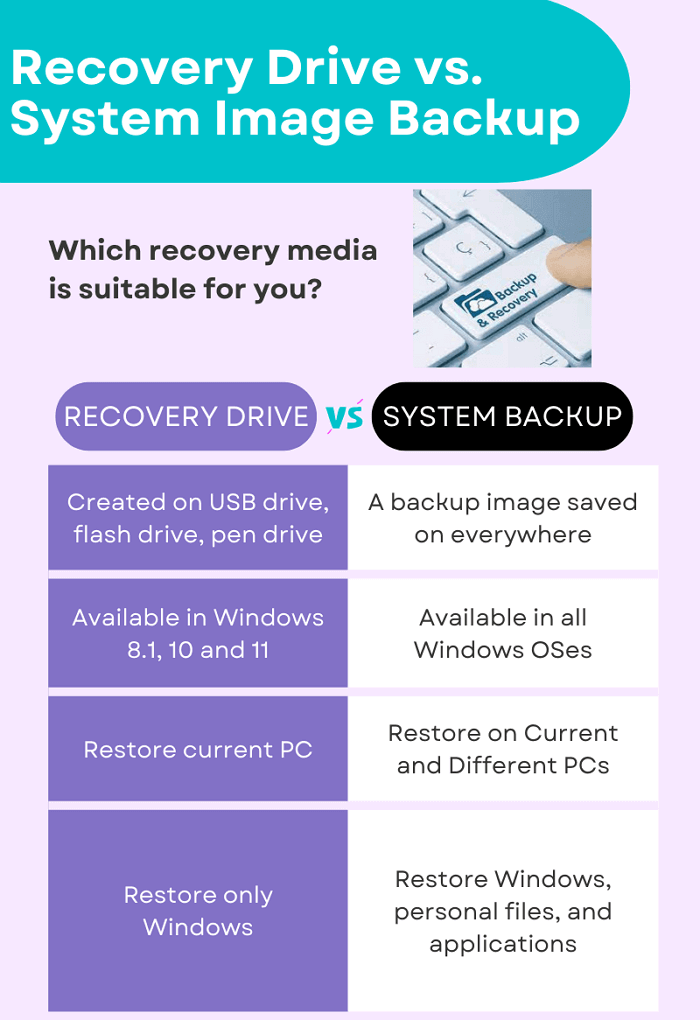
Image courtesy of via Google Images
Store It Properly
It's crucial to keep your USB stick in a safe place where it won't get lost or damaged. You can store it in a small, secure container or a dedicated drawer to ensure it stays safe and doesn't get misplaced. Remember, this little stick holds the key to starting Windows 11 on a computer, so it's essential to take good care of it.
Update It Sometimes
Just like your computer needs updates, our bootable USB also needs to be updated from time to time. Windows 11 may receive new features and updates, so it's important to keep your bootable USB in line with these changes. By updating it occasionally, you ensure that it is always ready to help start Windows 11 on any computer. Be sure to check for updates and follow any instructions to keep your bootable USB current and effective.
Conclusion
Great job, 5th graders! You've now learned how to create a special USB stick that can start Windows 11 on a computer. Isn't that amazing?
By following the steps outlined in this guide, you can now make your very own bootable USB and become a tech-savvy wizard. Remember, practice makes perfect, so don't be afraid to try it out and experiment with different ways to use your bootable USB!
Keep up the good work and keep exploring the exciting world of technology. Who knows, you might even discover new ways to use your bootable USB and impress your friends and family with your newfound skills. Until next time, happy computing!
Frequently Asked Questions (FAQs)
Some questions kids like you ask about making a bootable USB for Windows 11.
Why can't I just copy Windows 11 to my USB?
Copying doesn't make it ready to start a computer, the creation tool does. Think of it like this: just putting a puzzle piece on the table isn't the same as fitting it into the right spot. The creation tool helps make sure all the pieces are in the right place for your computer to start.
Can I use my bootable USB on any computer?
Mostly yes, but sometimes a computer needs a little help to work with it. Just like how some toys need batteries to work, some computers may need a little extra help to understand how to use your bootable USB. It's like teaching a new friend how to play your favorite game - once they learn, they can join in on the fun!


