Maximize Chrome on Windows 11

Unleash the full potential of your browsing experience with these 10 secret tips to maximize Chrome on Windows 11!
Table of Contents
Introduction to Chrome on Windows 11
We'll start with a look at why Google Chrome is a popular web browser for those using Windows 11. If you're eager to explore the world wide web and discover exciting things online, Chrome is your gateway to endless possibilities right at your fingertips.
What is Google Chrome?
Google Chrome is like a magic window that lets you peek into the amazing world of the internet. Imagine it as your trusty guide on the digital highway, helping you search for information, watch videos, play games, and connect with friends. It's fast, easy to use, and filled with cool features that make your online adventures even more fun.
Starting up with Windows 11
When you boot up your computer with Windows 11, Google Chrome is waiting to greet you with open tabs ready for exploration. It's like having your favorite spot saved for you every time you enter the online realm. Whether you're checking the latest news, browsing social media, or diving into your favorite websites, Chrome is there to accompany you on your digital journey.
Installing Chrome on Windows 11
In this section, we will guide you on how to get Chrome on your Windows 11 computer, whether it's a 32-bit or 64-bit version.
Step-by-Step Installation Guide
If you're ready to install Google Chrome on your Windows 11 PC, follow these simple steps:
1. Open your current web browser and go to the official Google Chrome website.
2. Look for the download button and click on it.
3. Once the download is complete, open the file to start the installation process.
4. Follow the on-screen instructions to complete the installation.
5. After the installation is finished, you can open Chrome and start browsing the web.
32-Bit vs. 64-Bit Systems
Before downloading Chrome, it's important to know whether your Windows 11 system is 32-bit or 64-bit. Most modern computers run on 64-bit systems, but if you're unsure, here's how you can check:
- Click on the Start menu and go to Settings.
- Select System and then About.
- Under Device specifications, look for System type to see if it says 32-bit or 64-bit operating system.
Once you've determined whether your system is 32-bit or 64-bit, you can download the appropriate version of Google Chrome for your Windows 11 computer.
Customizing Chrome for Windows 11
Are you ready to make Google Chrome your very own on your Windows 11 computer? Let's dive into how you can customize Chrome to suit your preferences with themes and settings.
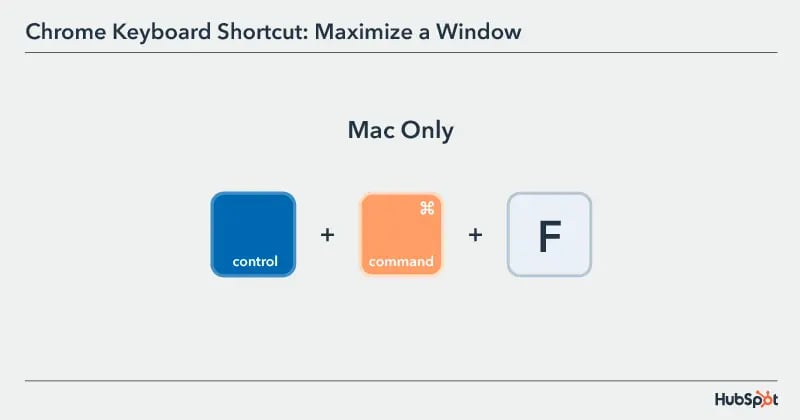
Image courtesy of blog.hubspot.com via Google Images
Personalizing Chrome
One of the coolest things about Google Chrome is that you can make it look just the way you want. You can choose from a variety of themes to add some flair to your browsing experience. Whether you like bright colors, dark tones, or something in between, there's a theme out there for you. Simply go to the Chrome Web Store, search for "themes," and pick the one that speaks to you. Once you've found the perfect theme, click on "Add to Chrome" to give Chrome a fresh new look.
But customization doesn't stop there. You can also tweak your settings in Chrome to make it work just the way you like. From changing your homepage to adjusting privacy and security features, Chrome lets you set things up exactly how you want them. To access your settings, click on the three dots in the top right corner of the Chrome window, then select "Settings." From there, you can explore all the different options available and make Chrome truly yours.
Setting Chrome as Default
Do you want Google Chrome to be your go-to browser every time you open a link or webpage? Setting Chrome as your default browser is super easy. All you have to do is open Chrome, click on the three dots in the top right corner, and select "Settings." Scroll down to the "Default browser" section and click on "Make default." Now, whenever you click on a link, Chrome will automatically open to show you the webpage.
Troubleshooting Common Issues
If Google Chrome is acting up on your Windows 11 computer, one handy tool you can use is the Event Viewer. This tool allows you to check for any errors or issues that might be causing Chrome to misbehave.
| Step | Description |
|---|---|
| 1 | Open Google Chrome on Windows 11. |
| 2 | Locate the "Maximize" button on the top right corner of the Chrome window. It looks like a square icon with two arrows pointing outwards. |
| 3 | Click on the "Maximize" button to expand the Chrome window to fill the entire screen. |
| 4 | If you want to exit the full-screen mode, simply press the "Escape" key on your keyboard or move your cursor to the top of the screen to reveal the exit button. |
To access Event Viewer, simply type "Event Viewer" in the Windows search bar and open the application. Once inside, navigate to the "Windows Logs" section and click on "Application." Here, you can look for any recent errors related to Google Chrome by filtering the log results.
If you find any errors, you can use this information to troubleshoot and fix the issue. Whether it's a compatibility problem or a software conflict, Event Viewer can help you pinpoint the root cause of the problem and take appropriate action.
Common Chrome Problems
Despite being a top-notch browser, Google Chrome can sometimes run into common issues. Here are a few quick fixes for the usual hiccups you might encounter while using Chrome on Windows 11:
- Chrome Not Responding: If Chrome freezes or stops responding, try closing the browser and reopening it. You can also check for any pending updates that might be causing stability issues.
- Slow Performance: If Chrome is running sluggishly, clear your browsing data and cache. This can help improve performance by removing unnecessary files that might be slowing down the browser.
- Extensions Causing Problems: Sometimes, browser extensions can cause compatibility issues with Chrome. Disable or remove any extensions that might be causing trouble to see if that resolves the issue.
By following these simple tips, you can quickly resolve common Chrome problems and get back to enjoying a smooth browsing experience on Windows 11.
Advanced Features for Pro Users
If you have Windows 11 Pro N, you might be wondering what sets it apart from other versions. Windows 11 Pro N is a specialized edition of Windows designed for countries in the European Union where Microsoft is required to offer versions of Windows without Windows Media Player pre-installed. This version gives users more control over their media options and is tailored for certain regulatory requirements.
Image courtesy of blog.hubspot.com via Google Images
Chrome for Power Users
For those using Windows 11 Pro N, Google Chrome offers some advanced features to enhance your browsing experience. Power users can take advantage of features like tab grouping, which allows you to organize your tabs for better productivity. You can also enable advanced security settings to protect your privacy while browsing online.
Summarizing Chrome on Windows 11
After exploring the ins and outs of using Google Chrome on Windows 11, it's time to recap all the helpful tips and tricks shared to enhance your browsing experience.
First, we learned that Google Chrome is a popular web browser known for its speed and user-friendly features. When you start up your Windows 11 computer, Chrome is ready to go, making it easy to access your favorite websites right away.
Installing Chrome on Windows 11 is a breeze, whether you're using a 32-bit or 64-bit system. By following a simple step-by-step installation guide, you can have Chrome up and running in no time, customized to your preferences with themes and settings that reflect your style.
For troubleshooting common issues that may arise while using Chrome on Windows 11, the Event Viewer tool can help diagnose and fix errors. Additionally, quick fixes are available for common hiccups to ensure smooth browsing.
If you're a Windows 11 Pro N user, there are advanced features in Chrome that cater to power users, allowing you to maximize your browsing experience on this specialized edition of Windows.
In conclusion, with all the information provided in this guide, you are now equipped to make the most out of using Chrome on Windows 11. From installation to customization, troubleshooting, and advanced features, you have all the tools to enhance your browsing experience on this latest version of Windows.
FAQs about Using Chrome on Windows 11
Answering the most common questions about using Chrome on the latest version of Windows.
How do I set Chrome as my default browser?
Setting Chrome as your default browser is easy. First, open Chrome and click on the three dots at the top right corner. Then, select "Settings" from the dropdown menu. In the Settings tab, scroll down until you see the "Default browser" option. Click on it and choose "Make default." That's it! Now, Chrome will be your primary web browser whenever you click on a link or open a website.
Can I use Chrome on Windows 11 Pro N?
Absolutely! Chrome works perfectly fine on Windows 11 Pro N. Whether you're browsing the web, watching videos, or working on documents, Chrome is fully compatible with Windows 11 Pro N. You can enjoy all the features and benefits of Chrome on this version of Windows without any issues.
What do I do if Chrome is not responding?
If Chrome is not responding, don't worry. There are a few steps you can take to fix this issue. First, try closing Chrome and reopening it. If that doesn't work, restart your computer to refresh everything. You can also check for any Chrome errors using the Event Viewer tool on Windows 11. If the problem persists, you can try reinstalling Chrome to see if that resolves the issue. These simple troubleshooting steps should help you get Chrome up and running smoothly again.
Generated by Texta.ai Blog Automation


