Setting Up Windows 11 VM: A Simple Guide
Setting Up Windows 11 VM: A Simple Guide
Introduction
What is a virtual machine?
A virtual machine (VM) is a software emulation of a physical computer that enables you to run an operating system (OS) or multiple OSs on a single physical machine. It allows you to create and manage multiple isolated environments within your computer, each with its own virtual hardware resources, such as CPU, memory, storage, and network interfaces. VMs are commonly used for various purposes, including software development, testing, and running legacy applications. Microsoft plans to remove VBScript from Windows in the future, as it is an outdated scripting language that poses security risks.
Why use a virtual machine?
Using a virtual machine (VM) is a great way to get the most out of Windows 11. With a VM, you can run multiple operating systems on a single physical computer, allowing you to test software, experiment with different configurations, and isolate potentially harmful applications. It provides a safe and controlled environment where you can explore new features and functionalities without affecting your main operating system. By using a VM, you can also take advantage of snapshots, which allow you to save the state of your VM at any point in time and easily revert back if something goes wrong. Overall, a virtual machine is an essential tool for anyone who wants to explore and utilize the full potential of Windows 11.
Benefits of using a virtual machine
Using a virtual machine (VM) can bring numerous benefits to your computing experience. VMs allow you to create and run multiple operating systems on a single physical machine, providing a convenient way to test software and applications in different environments. By isolating the virtual environment from your host system, VMs offer enhanced security and protection against malware and viruses. Additionally, VMs can help optimize your productivity by enabling you to run multiple instances of an operating system or application simultaneously, allowing for efficient multitasking. With the ability to take snapshots and restore previous states, VMs also provide a reliable and flexible solution for software development, troubleshooting, and experimenting with new configurations. Overall, incorporating virtual machines into your workflow can greatly enhance your computing capabilities and streamline various tasks.
System Requirements
Minimum system requirements
To set up a Windows 11 VM, you need to ensure that your system meets the minimum requirements. These requirements include a compatible processor, at least 4 GB of RAM, and 64 GB of available storage space. Additionally, your system should support virtualization technology, such as Intel VT-x or AMD-V. It is also recommended to have a stable internet connection for downloading the Windows 11 ISO file. Following these minimum system requirements will ensure a smooth installation process and optimal performance of your Windows 11 VM.
Recommended system requirements
To ensure a smooth experience while setting up Windows 11 VM, it is recommended to have a computer that meets the following system requirements:
| Requirement | Minimum | Recommended |
|---|---|---|
| Processor | 1 GHz | 1 GHz or faster, with 2 or more cores |
| RAM | 4 GB | 8 GB or more |
| Storage | 64 GB | 128 GB or more |
These requirements are essential for optimal performance and to avoid any potential issues during the setup process. By meeting these specifications, you can ensure that your Windows 11 VM operates efficiently and is capable of handling various tasks. It is important to note that failing to meet these requirements may result in a slower performance or compatibility issues with certain features or applications. Therefore, it is highly recommended to have a computer that meets or exceeds these system requirements to fully enjoy the benefits of Windows 11 VM.
Checking system compatibility
Before setting up Windows 11 VM, it is important to check if your system meets the necessary requirements. Windows 11 requires a compatible processor, twice the speed of the previous generation, to ensure optimal performance. Additionally, your system should have at least 4 GB of RAM and 64 GB of storage space. To check the compatibility of your processor, you can refer to the manufacturer's specifications or use the Windows PC Health Check tool. This tool will analyze your system and provide a detailed report on its compatibility with Windows 11. It is recommended to perform this check before proceeding with the installation.
Downloading Windows 11 ISO
Finding the official Windows 11 ISO
To set up a Windows 11 virtual machine (VM), you first need to find the official Windows 11 ISO file. The ISO file contains the installation files for Windows 11, which you will use to install the operating system on your VM. Here are the steps to find the official Windows 11 ISO:
- Visit the official Microsoft website.
- Navigate to the Windows 11 download page.
- Look for the download link for the Windows 11 ISO.
- Click on the download link to start the download.
Once you have downloaded the Windows 11 ISO file, you can proceed to the next step of setting up your Windows 11 VM.
Downloading the Windows 11 ISO
To set up a Windows 11 virtual machine (VM), the first step is to download the Windows 11 ISO file. The ISO file contains the installation files for Windows 11 and is required to create a virtual machine. To download the Windows 11 ISO, follow these steps:
- Open a web browser and navigate to the Microsoft website.
- Go to the Windows 11 download page.
- Click on the 'Download now' button.
- Select the edition of Windows 11 you want to download.
- Choose the language and architecture (32-bit or 64-bit) that matches your system.
- Click on the 'Download' button.
Once the download is complete, you will have the Windows 11 ISO file ready to use for setting up your virtual machine. It is important to note that the Windows 11 ISO file is quite large, so make sure you have enough disk space available. If you are using a free VMware for Apple Silicon Macs, ensure that your system meets the minimum requirements for running Windows 11.
Verifying the integrity of the ISO file
To ensure that the Windows 11 ISO file you have downloaded is not corrupted or tampered with, it is important to verify its integrity. Follow the step by step guide below to perform the verification process:
- Open a command prompt window.
- Navigate to the directory where the Windows 11 ISO file is located.
- Type the following command:
certutil -hashfile <ISO_file_name> SHA256 - Replace
<ISO_file_name>with the actual name of the ISO file. - Press Enter to execute the command.
The command will calculate the SHA256 hash value of the ISO file and display it on the command prompt. Compare this hash value with the official hash value provided by Microsoft to ensure that the file has not been altered during the download process. If the hash values match, it means that the ISO file is intact and can be used for setting up a Windows 11 virtual machine.
Setting Up a Virtual Machine
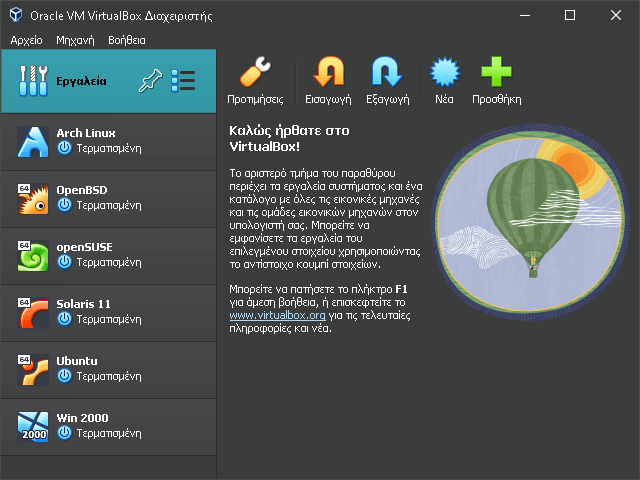
Choosing a virtualization software
When setting up a Windows 11 virtual machine (VM), one of the first decisions you need to make is choosing a virtualization software. There are several options available, each with its own features and capabilities. Here are some popular virtualization software options to consider:
| Software | Description |
|---|---|
| Oracle VM VirtualBox | A free and open-source virtualization software that supports running multiple operating systems simultaneously. It offers a user-friendly interface and a wide range of features. |
| VMware Workstation | A premium virtualization software that provides advanced features and performance optimizations. It is known for its stability and compatibility with various operating systems. |
| Hyper-V | A built-in virtualization platform in Windows that allows you to create and manage virtual machines. It is a good choice if you are already using Windows as your host operating system. |
When choosing a virtualization software, consider factors such as your technical expertise, the specific requirements of your Windows 11 VM, and your budget. It is recommended to try out different software options and evaluate their performance and compatibility before making a final decision.
Creating a new virtual machine
To create a new virtual machine in Windows 11, follow these steps:
- Open the Hyper-V Manager by searching for it in the Start menu.
- Click on Action in the menu bar and select New followed by Virtual Machine.
- In the New Virtual Machine Wizard, click Next to proceed.
- Choose a name and location for the virtual machine, then click Next.
- Select the amount of memory (RAM) to allocate to the virtual machine, then click Next.
- Choose a network connection for the virtual machine, then click Next.
- Select Create a new virtual hard disk and specify the size and location for the virtual hard disk, then click Next.
- Review the summary of the virtual machine settings and click Finish to create the virtual machine.
Once the virtual machine is created, you can start it by selecting it in the Hyper-V Manager and clicking on Start. You can then install an operating system on the virtual machine and use it just like a physical computer.
Configuring virtual machine settings
When setting up a Windows 11 virtual machine, it is important to configure the virtual machine settings properly. This ensures optimal performance and functionality. Here are some tips for enhancing virtual machine performance:
- Allocate Sufficient Resources: Make sure to allocate enough memory, CPU cores, and disk space to the virtual machine. This allows it to run smoothly without any lag or performance issues.
- Enable Hardware Acceleration: Enable hardware acceleration for the virtual machine to take advantage of your computer's hardware capabilities. This can significantly improve graphics performance and overall responsiveness.
- Configure Networking: Set up the networking options for the virtual machine, such as choosing the appropriate network adapter and configuring network settings. This allows the virtual machine to connect to the internet and other devices on the network.
- Install Guest Additions: Install the guest additions software provided by the virtualization platform. This software enhances the integration between the virtual machine and the host system, improving performance and enabling additional features.
By following these tips, you can ensure that your Windows 11 virtual machine is properly configured and optimized for the best performance.
Installing Windows 11
Mounting the Windows 11 ISO
To install Windows 11 on a virtual machine, you first need to mount the Windows 11 ISO file. Here are the steps to do this:
- Open your virtual machine software and navigate to the settings.
- Look for the option to add a new optical drive or mount an ISO file.
- Click on the option to mount an ISO file.
- Browse and select the Windows 11 ISO file from your computer.
- Confirm the selection and proceed.
Once the ISO file is mounted, you can start the virtual machine and begin the installation process. If you encounter any errors such as 'cannot activate Windows 11', make sure to check your internet connection and product key.
Starting the virtual machine
To start the virtual machine, follow these steps:
- Open the virtualization software.
- Select the Windows 11 VM from the list of available virtual machines.
- Click on the 'Start' button to launch the VM.
Once the virtual machine is running, you will be able to interact with Windows 11 just like you would on a physical computer. You can browse the internet, install applications, and even perform tasks such as fast grocery delivery. The virtual machine provides a safe and isolated environment, allowing you to experiment and test different configurations without affecting your main operating system. Remember to save your work and properly shut down the VM when you're done.
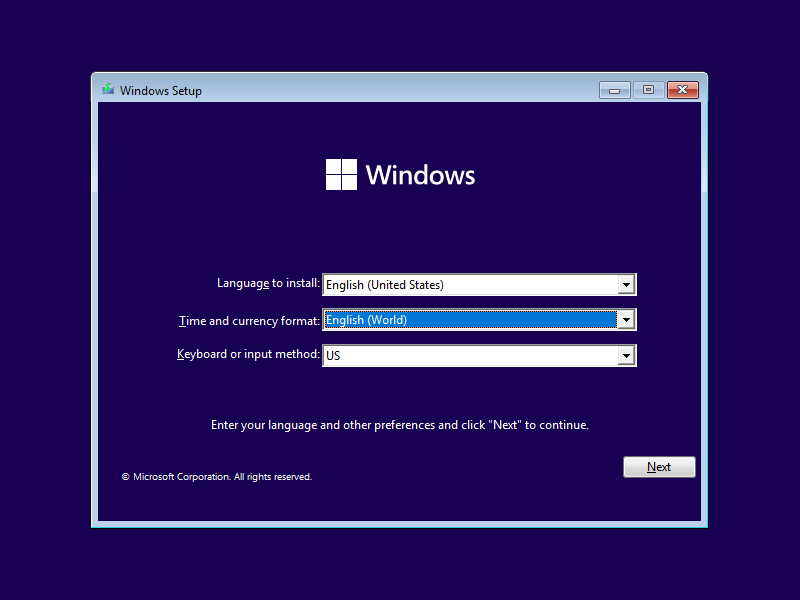
Installing Windows 11
To install Windows 11 on a virtual machine, follow these steps:
- Download the Windows 11 ISO file from the official Microsoft website.
- Create a new virtual machine using virtualization software such as VirtualBox or VMware.
- Configure the virtual machine settings, including the amount of RAM and storage space.
- Mount the Windows 11 ISO file to the virtual machine's optical drive.
- Start the virtual machine and boot from the Windows 11 ISO.
- Follow the on-screen instructions to install Windows 11.
- Enter the product key when prompted.
- Complete the installation process by setting up user preferences and installing necessary drivers.
Once the installation is complete, you can start using Windows 11 on your virtual machine. Remember to install any necessary updates and activate Windows 11 with a valid license key.
FAQ (Frequently Asked Questions)

Can I run Windows 11 on my current computer?
If you're wondering whether your current computer can run Windows 11, there are a few things you need to consider. First, check the system requirements. Windows 11 has higher hardware requirements compared to previous versions. It requires a 64-bit processor with at least 1 GHz clock speed and 2 or more cores. Additionally, you'll need 4GB of RAM or more. Unfortunately, if your computer only has 2GB of RAM, it won't meet the minimum requirements. Windows 11 also requires 64GB of storage and a DirectX 12 compatible graphics card. Make sure your computer meets these requirements before attempting to install Windows 11. If your computer doesn't meet the requirements, you may need to consider upgrading your hardware or using a virtual machine (VM) to run Windows 11.
What virtualization software is recommended for Windows 11?
When setting up a Windows 11 virtual machine (VM), it is important to choose the right virtualization software. VirtualBox and VMware Workstation Player are two popular options that are recommended for running Windows 11 VMs. Here is a comparison of the two:
| Virtualization Software | VirtualBox | VMware Workstation Player |
|---|---|---|
| Cost | Free | Free |
| Ease of Use | Easy | Easy |
| Performance | Good | Excellent |
Both VirtualBox and VMware Workstation Player provide a user-friendly interface and support a wide range of operating systems, including Windows 11. They offer features such as snapshotting, which allows you to save the state of the VM at a particular point in time, and seamless integration with the host operating system. Overall, both VirtualBox and VMware Workstation Player are reliable choices for setting up a Windows 11 VM.
Can I use a Windows 10 ISO to install Windows 11?
When it comes to installing Windows 11, using a Windows 10 ISO is not recommended. Windows 11 is a separate operating system with its own set of requirements and features. While it may be possible to use a Windows 10 ISO to install Windows 11, it is not the recommended method. Enabling virtualization in Windows 11 made easy is one of the key features of the new operating system, and using a Windows 10 ISO may not fully utilize these features. It is always best to use the official Windows 11 ISO provided by Microsoft for a seamless installation experience.


