Setup Win 10 Bootable USB In Steps
Unlock the secret to creating a Win 10 bootable USB in just a few simple steps - you won't believe how easy!
Table of Contents
Introduction: Getting Ready to Create a Windows 10 Bootable USB
We're going to learn about making a special USB stick that lets you start a computer with Windows 10. This is called a 'bootable USB'.
What You Need Before You Start
Let's talk about the things you need to have to make your bootable USB.
Checking Your Windows PC
First, make sure your computer can work with Windows 10 Pro and has everything ready to go.
Getting the Windows 10 Pro Software
You'll need to get the stuff that puts Windows 10 Pro onto the USB stick.
Choosing the Right USB Stick
You need a USB stick to put the Windows 10 on. Let's make sure you pick the right one!
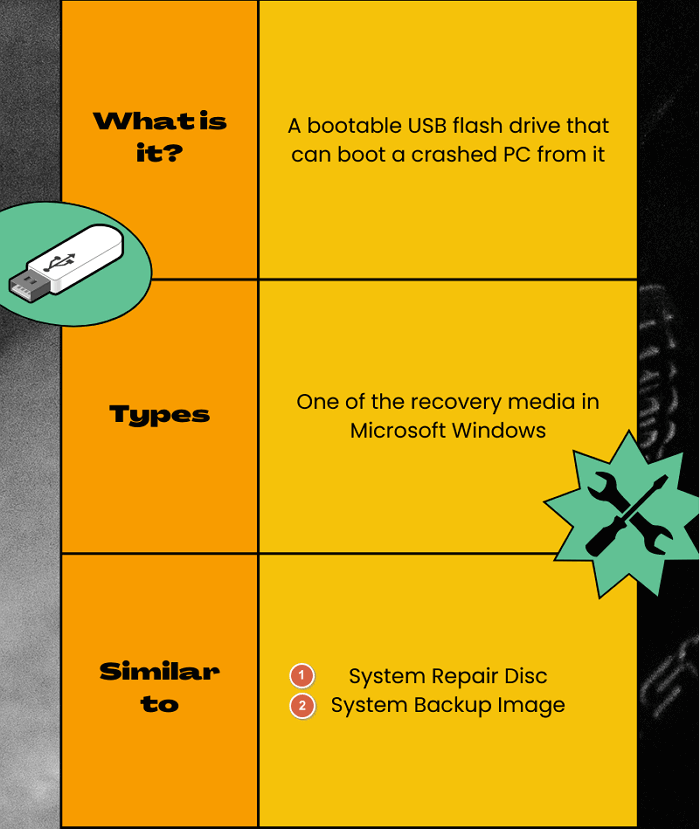
Image courtesy of www.easeus.com via Google Images
Size Matters
When it comes to choosing a USB stick for creating a bootable Windows 10 drive, size does matter. The USB stick needs to have enough space to store all the files necessary for Windows 10. Typically, a USB stick with a capacity of 8GB or more will work well for this purpose. So, make sure to check the storage capacity of the USB stick before proceeding.
USB Stick Format
Before you can use a USB stick to create a bootable Windows 10 drive, you need to format it properly. Formatting a USB stick prepares it to receive the Windows 10 files and ensures that it can be used as a bootable device. Make sure to follow the instructions for formatting the USB stick so that it is ready to become a bootable USB for Windows 10.
Creating Your Bootable USB Stick
Now, we will go step by step to turn your USB into one that can start your computer with Windows 10.
Using the Right Software to Make the USB Bootable
First, you need to find the correct program from Microsoft that will help you make the USB start with Windows 10. This software is essential to ensure that your USB stick is properly set up to boot your computer with Windows 10.
Copying Windows 10 onto the USB Stick
Once you have the software ready, you will need to learn how to move the Windows 10 software onto your USB stick in the right way. This process involves carefully transferring all the necessary files and components of Windows 10 onto your USB stick so that it can successfully boot your computer.
Testing Your Windows 10 Bootable USB
Once you've created your Windows 10 bootable USB, the next step is to test it on another Windows computer. Here's how you can start a computer using your newly created bootable USB:
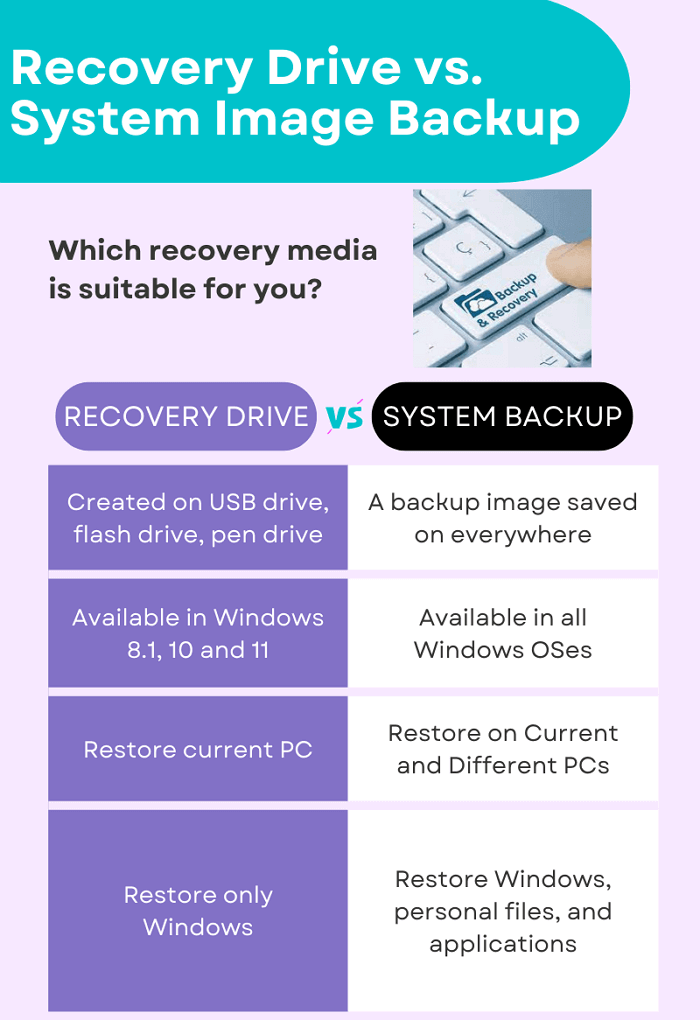
Image courtesy of www.easeus.com via Google Images
1. Insert the bootable USB into a USB port on the computer you want to start with Windows 10.
2. Restart the computer. You may need to access the BIOS or UEFI settings to set the USB drive as the primary boot device. This process varies depending on the computer's manufacturer. Consult the computer's manual or do a quick online search for specific instructions on how to access these settings for your particular device.
3. Once the computer boots from the USB drive, you should see the Windows 10 installation screen. Follow the on-screen instructions to proceed with the installation process.
Troubleshooting Common Problems
If you encounter any issues while trying to start the computer with the bootable USB, here are some common problems and solutions:
1. The computer is not recognizing the USB drive: In this case, try inserting the USB drive into a different USB port on the computer. If that doesn't work, the USB drive may be faulty, and you may need to recreate the bootable USB using a different USB stick.
2. Error message when booting from USB: If you receive an error message during the boot process, double-check that you followed all the steps correctly when creating the bootable USB. It's possible that there was an error during the creation process that needs to be addressed.
3. Slow booting from USB: If the computer is taking a long time to boot from the USB, it could be due to the speed of the USB drive or the computer's hardware specifications. Consider using a faster USB drive or optimizing the computer's settings for better performance.
By following these troubleshooting steps and ensuring that your bootable USB is created correctly, you should be able to start a Windows 10 computer using the USB drive successfully.
Wrapping Up: What You've Accomplished
Now that you've followed all the steps to create a Windows 10 bootable USB, let's review what you've achieved together.
| Step | Description |
|---|---|
| Step 1 | Insert a USB drive (at least 8GB) into your computer. |
| Step 2 | Download the Windows 10 ISO file from the official Microsoft website. |
| Step 3 | Download and install the Windows USB/DVD Download Tool from Microsoft. |
| Step 4 | Open the Windows USB/DVD Download Tool and select the Windows 10 ISO file. |
| Step 5 | Choose the USB drive as the media type to create a bootable USB. |
| Step 6 | Click on "Begin copying" to start the process of creating a bootable USB drive. |
| Step 7 | Wait for the tool to finish creating the bootable USB drive. |
| Step 8 | Once completed, safely eject the USB drive from your computer. |
Step 1: Getting Ready
You learned how to prepare a special USB stick that can start a computer with Windows 10 installed on it. This is called a 'bootable USB'.
Step 2: Getting What You Need
You made sure your Windows PC was ready for Windows 10 Pro and obtained the necessary software to install Windows 10 Pro on the USB stick.
Step 3: Choosing the Right USB
You selected the correct USB stick size and formatted it to be ready for Windows 10 installation.
Step 4: Creating the Bootable USB
You used the right software from Microsoft to turn your USB into a bootable device capable of starting a computer with Windows 10. You also successfully copied Windows 10 onto the USB stick.
Step 5: Testing Your Bootable USB
After creating the bootable USB, you tested it on a different Windows computer to ensure it works properly. You also learned how to troubleshoot any common problems that may arise during the process.
With these steps, you have successfully created a Windows 10 bootable USB that you can use to start a computer with ease. Great job!
Frequently Asked Questions
Here, we'll answer some questions you might have about making and using a bootable USB for Windows 10.
Can I use any USB stick to create a Windows 10 bootable USB?
It's important to choose the right USB stick to create a bootable USB for Windows 10. Make sure the USB stick has enough space to hold all the necessary files for Windows 10.
Do I need special software to create a Windows 10 bootable USB?
Yes, you will need to use a special program from Microsoft to make your USB stick bootable with Windows 10. This software will help you copy the Windows 10 files onto the USB stick in the right way.
Can I use a Windows 10 bootable USB on any computer?
Once you have created a Windows 10 bootable USB, you can use it on any Windows computer that supports booting from a USB device. Just make sure to follow the steps to start the computer using the USB stick.
What should I do if my computer doesn't start with the Windows 10 bootable USB?
If you encounter any issues with starting your computer using the bootable USB, you can troubleshoot common problems. This may include checking the boot order in the BIOS settings or ensuring the USB stick is properly inserted.


