Upgrade Like a Pro: Navigating Windows 11

Discover the expert tips and tricks to master your Windows 11 upgrade process and take your computer skills to the next level.
Table of Contents
- Introduction: Jumping into Windows 11
- Section 1: What is Windows 11?
- Before You Upgrade
- Starting Your Upgrade
- Section 4: Hello, Windows 11!
- Section 5: Making the Most of Windows 11
- Troubleshooting Common Hiccups
- Section 7: Learning More with How-To Guides
- Preparing for the Future
- Conclusion: You're a Windows 11 Pro!
- FAQs: All Your Curious Questions Answered
Introduction: Jumping into Windows 11
In this starting part, we'll talk about what Windows 11 is, why it's exciting, and how this article will make upgrading a piece of cake for you.
Are you ready to dive into the wonderful world of Windows 11? Upgrading your computer's operating system may seem like a big task, but with the right guidance and tips, you'll be navigating Windows 11 like a pro in no time. Let's explore the amazing features and enhancements that Windows 11 has to offer and discover how this guide will help you smoothly transition to this latest version.
Section 1: What is Windows 11?
Windows 11 is the latest version of the Windows operating system for your computer. Just like you get new updates on your tablet or phone, Windows 11 is like a fresh coat of paint for your computer. It's like getting new superpowers for your device!
Windows 11 at a Glance
Windows 11 brings some cool new features to your computer that make using it easier and more fun. Imagine having a magic wand that can organize your stuff beautifully, make everything look sleek and modern, and even help you play your favorite games better. That's what Windows 11 is all about!
Before You Upgrade
This section covers the important steps before you start upgrading, like checking your computer can use Windows 11.

Image courtesy of www.midnightbluetech.com via Google Images
Checking Your Computer's Age and Power
Before you dive into upgrading to Windows 11, it's crucial to ensure that your computer meets the necessary requirements. You'll want to check your computer's age and power to see if it can handle the new operating system smoothly. Windows 11 has specific hardware requirements, so verifying if your computer can support it will save you from potential issues during the upgrade process.
Saving Your Files and Games
While upgrading to Windows 11, it's essential to safeguard your files and games. You wouldn't want to lose any important documents, photos, or your favorite gaming progress, right? Before making the switch, make sure to back up all your files and games to an external drive or cloud storage. This way, you can easily transfer them back onto your computer once the upgrade is complete, ensuring a seamless transition to Windows 11.
Starting Your Upgrade
Now let's get into the upgrade process step-by-step. Don't worry; we've made it super simple!
Step-by-Step Upgrade Process
Upgrading to Windows 11 is easy when you follow these simple steps:
1. Start by clicking on the Windows icon in the bottom left corner of your screen. This will open the Start menu.
2. In the Start menu, click on the Settings icon, which looks like a gear. This will open the Settings menu.
3. In the Settings menu, click on the "Update & Security" option. This will take you to the Windows Update section.
4. Look for the "Check for updates" button and click on it. Windows will now check if there are any updates available for your computer.
5. If Windows 11 is available for your computer, you will see an option to download and install it. Click on this option to start the upgrade process.
6. Follow the on-screen instructions to complete the installation of Windows 11. Your computer may need to restart a few times during the process.
7. Once the installation is complete, you will be greeted with the new and exciting Windows 11 desktop. Congratulations, you have successfully upgraded to Windows 11!
With these easy steps, you'll be navigating Windows 11 like a pro in no time!
Section 4: Hello, Windows 11!
So, you've successfully upgraded to Windows 11 - congratulations! Now it's time to make this new system truly your own. Let's dive into how you can customize your Windows 11 to suit your style and needs.
Image courtesy of www.wpbeginner.com via Google Images
First things first, let's personalize your desktop. Right-click on the desktop background and select "Personalize." Here, you can choose from different themes, colors, and backgrounds to make your desktop uniquely yours. Play around with the options until you find the perfect look that makes you smile every time you see it.
Next, let's organize your taskbar. Pin your favorite apps for quick access by right-clicking on an app icon and selecting "Pin to taskbar." You can also rearrange the apps on your taskbar by clicking and dragging them to your preferred position. This way, you'll have all your go-to apps just a click away.
Now, let's talk about widgets - these are like little information hubs that can show you the weather, news, your calendar, and more. To access widgets, click on the widgets icon on the taskbar or press the Windows key + W. Customize your widgets by adding, removing, or rearranging them to get the updates that matter most to you.
Lastly, don't forget to explore the new Snap Layouts feature. This allows you to snap windows into different layouts on your screen, making multitasking a breeze. Simply drag a window to a corner or side of your screen, and Windows 11 will suggest layouts for you to choose from. This way, you can work on multiple things at once without feeling overwhelmed.
By personalizing your Windows 11 desktop, organizing your taskbar, exploring widgets, and utilizing Snap Layouts, you can make your Windows 11 experience truly exceptional. Have fun customizing your space and enjoy the new features Windows 11 has to offer!
Section 5: Making the Most of Windows 11
Here, we'll dive into awesome tips and tricks to become a master at using Windows 11.
Clever Tricks and Tips
Are you ready to take your Windows 11 experience to the next level? Let's explore some clever tricks and tips that will make using your new operating system even more enjoyable.
1. Personalize Your Desktop: Make your computer uniquely yours by customizing your desktop background, theme colors, and taskbar settings. Right-click on the desktop, select "Personalize," and let your creativity shine!
2. Pin Your Favorite Apps: Easily access your most-used apps by pinning them to the taskbar or Start menu. Simply right-click on an app and choose "Pin to taskbar" or "Pin to Start" for quick and convenient access.
3. Snap Assist: Maximize your productivity by using the Snap Assist feature. Drag a window to the edge of the screen to automatically resize it, or press the Windows key + an arrow key to snap windows to different sides of the screen for efficient multitasking.
4. Virtual Desktops: Stay organized by creating multiple virtual desktops. Press the Windows key + Tab to access Task View, then click on "New Desktop" to create additional desktop spaces for different projects or tasks.
5. Search Like a Pro: Harness the power of Windows Search to quickly find files, apps, settings, and more. Simply click on the magnifying glass icon next to the Start button or press the Windows key + S to start searching instantly.
By incorporating these tips and tricks into your Windows 11 routine, you'll be well on your way to mastering this exciting new operating system.
Troubleshooting Common Hiccups
Sometimes, when you're using Windows 11, things may not go as smoothly as you'd like. Don't worry; we've got your back! Here are some common problems you might come across and how to fix them.
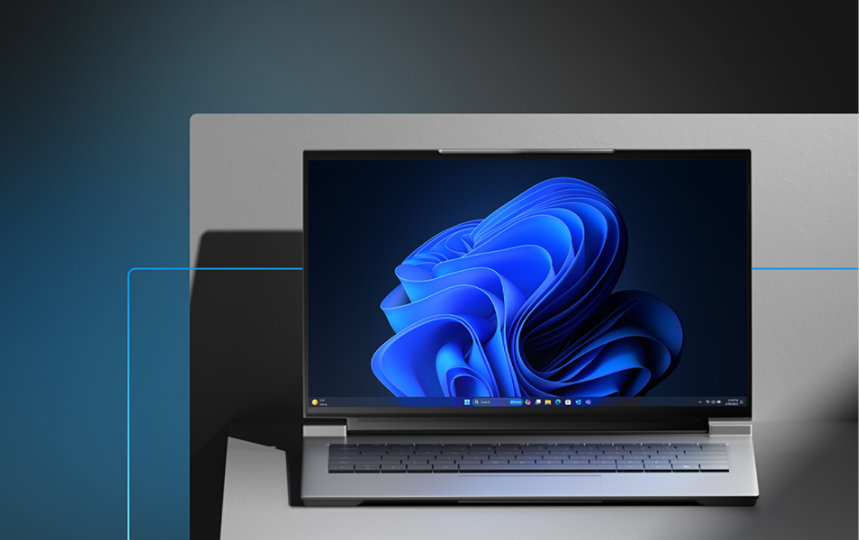
Image courtesy of www.microsoft.com via Google Images
Common Problems and How to Fix Them
If your computer screen suddenly goes blank or freezes while using Windows 11, it can be frustrating. But before you start to panic, try these simple solutions:
| Upgrade Like a Pro: Navigating Windows 11 | |
|---|---|
| Feature | Description |
| New Start Menu | Windows 11 introduces a centered Start Menu with rounded corners for a sleeker look. |
| Virtual Desktops | Easily organize your tasks with multiple virtual desktops that can be customized to your liking. |
| Teams Integration | Stay connected with colleagues seamlessly through built-in Microsoft Teams integration. |
| Improved Gaming Features | Experience enhanced gaming performance with DirectX 12 Ultimate and Auto HDR support. |
| New Snap Layouts | Effortlessly manage multiple windows with new Snap Layouts to optimize your workflow. |
| Widgets | Quickly access personalized news, weather, and other information with the revamped Widgets feature. |
1. Restart your computer: Sometimes, a quick reboot can solve a lot of issues. It refreshes your system and can fix minor glitches.
2. Check for updates: Make sure that your Windows 11 is up to date. Updates often include bug fixes that can resolve the problem you're facing.
3. Run a virus scan: Malware or viruses can cause your computer to behave strangely. Use your antivirus software to scan and remove any threats.
4. Adjust display settings: If you're having trouble with your screen resolution or colors, go to the display settings and make adjustments until it looks right to you.
5. Reinstall problematic software: If a specific application is causing issues, try uninstalling and then reinstalling it. This can sometimes resolve compatibility problems.
By following these simple steps, you can troubleshoot common hiccups that may arise while using Windows 11. Remember, there's always a solution to every problem, and with a little patience and persistence, you can keep enjoying all the fantastic features Windows 11 has to offer!
Section 7: Learning More with How-To Guides
So, you've upgraded to Windows 11 and now you're ready to dive deeper into all the amazing things it can do. That's where how-to guides come in handy! These guides are like instruction manuals that help you learn new skills and tricks with your computer. Let's see how you can make the most out of them.
Finding How-To Guides
If you want to become a Windows 11 expert, you can find a ton of how-to guides online. Websites like Microsoft's official support page, tech blogs, and YouTube channels offer step-by-step tutorials on everything from customizing your desktop to troubleshooting common issues. Just type in what you want to learn in the search bar and start exploring!
Mastering New Skills
Once you've found a how-to guide that interests you, take your time to follow each step carefully. These guides are designed to walk you through the process in a simple way, making it easy for you to learn new skills and become confident in using Windows 11. Whether it's creating a new folder, setting up a virtual desktop, or mastering keyboard shortcuts, how-to guides are your go-to resource for becoming a pro.
With how-to guides, the possibilities are endless. You can explore different features of Windows 11, improve your productivity, and discover shortcuts that make using your computer a breeze. So, don't be afraid to dig in and learn something new!
Preparing for the Future
As you enjoy your new Windows 11 experience, it's essential to think about how to keep it fresh and up-to-date with new updates. Let's explore some tips to ensure your Windows 11 stays running smoothly.
Image courtesy of www.techrepublic.com via Google Images
Regular Updates
Windows 11 is continually being improved and updated by Microsoft to enhance its performance, fix bugs, and provide new features. Make sure to enable automatic updates in your settings so that your operating system stays current and secure.
Backup Your Files
It's always a good idea to periodically back up your important files and documents. This way, if anything unexpected happens to your computer, like a hardware failure or a software issue, you won't lose your precious data.
Optimizing Performance
To ensure your Windows 11 runs smoothly, consider optimizing its performance by regularly cleaning up unnecessary files, uninstalling programs you no longer use, and checking for any software updates for your installed apps.
By following these simple tips, you can keep your Windows 11 running smoothly and enjoy all the benefits of this fantastic operating system.
Conclusion: You're a Windows 11 Pro!
After diving into this guide and following the steps to upgrade to Windows 11, you're now a pro at navigating the exciting world of this new operating system. You've successfully made the switch and are now ready to enjoy all the cool features Windows 11 has to offer.
By mastering the upgrade process, customizing your Windows space, and learning clever tips and tricks, you've set yourself up for success in using Windows 11 like a boss. No more feeling intimidated by the new system - you've got this!
FAQs: All Your Curious Questions Answered
Can my computer use Windows 11?
Wondering if your computer is up to snuff for Windows 11? It's essential to check if your computer can handle the new system. If your computer is relatively new or has decent specifications, you're likely good to go! But if you're not sure, don't worry. You can use the PC Health Check tool provided by Microsoft to see if your computer qualifies for the upgrade. Just run the tool, and it'll let you know if your system can smoothly run Windows 11.
What's the best thing about Windows 11?
The best thing about Windows 11 is its fresh and modern look. With a revamped Start menu, centered taskbar, and improved transitions and animations, Windows 11 offers a sleek and user-friendly interface. Additionally, Windows 11 comes with new features like Snap Layouts, Snap Groups, and Widgets, enhancing productivity and making multitasking a breeze. Overall, Windows 11 provides a more polished and intuitive user experience compared to its predecessors.
What if I don't like Windows 11?
If Windows 11 doesn't quite fit your preferences or workflow, don't worry. You have options! You can always revert to your previous version of Windows within the first ten days of upgrading to Windows 11. This means you can easily roll back to Windows 10 or whichever version you were using before. However, it's important to note that once this ten-day period expires, you won't be able to go back without performing a clean installation of your old Windows version. So, take your time to explore Windows 11 and decide if it's the right fit for you!


