Upgrade to Win 11: Step-by-Step Guide

Unlock the secrets of upgrading to Windows 11 with this easy-to-follow step-by-step guide. Upgrade your system like a pro!
Table of Contents
Introduction to Windows 11
Are you ready to take your Windows PC experience to the next level with the newest operating system from Microsoft? In this guide, we will delve into the exciting world of Windows 11 and explore what makes it a significant upgrade from older Windows versions.
Windows 11 is the latest offering from Microsoft, designed to provide users with a more streamlined and efficient computing experience. Whether you use your PC for work, school, or entertainment, Windows 11 aims to enhance your digital life in various ways.
With a focus on productivity, creativity, and ease of use, Windows 11 brings a fresh look and feel to your computer, introducing new features and improvements that will make everyday tasks more enjoyable and efficient. So, let's dive in and discover what makes Windows 11 a must-have upgrade for Windows PC users.
Is Your PC Ready for Windows 11?
Excited about upgrading to the new Windows 11 but not sure if your PC can handle it? Let's dive into what your computer needs to run Windows 11 smoothly and how you can check if your trusty old system is up to the task.
Checking Your PC's Specs
Before embarking on the Windows 11 journey, it's essential to know the technical details of your computer. To do this, right-click on the Windows Start menu, select System, and you'll find all the vital information you need, like processor, RAM, and storage space. Make a note of these specs to compare with Windows 11 requirements.
Windows 11 Compatibility
Windows 11 is a shiny new operating system that comes with specific hardware requirements to ensure optimal performance. It's looking for modern processors, a minimum amount of RAM, and a certain storage capacity. If your PC meets these standards, you're good to go for a seamless Windows 11 experience.
Backing Up Your Data Before Upgrading
Before diving into the exciting process of upgrading to Windows 11, there's one crucial step that you should never skip: backing up your data. Whether it's cherished photos, important documents, or favorite videos, taking the time to safeguard your personal files is always a wise decision.

Image courtesy of www.infotech.com via Google Images
Why Backups Are Important
Picture this: you're all set to upgrade your operating system, looking forward to the new features and advancements Windows 11 has to offer. But in the midst of the upgrade process, something goes wrong, and you realize that your files are nowhere to be found. This is where backups come to the rescue.
Backups serve as a safety net, ensuring that even if something unexpected occurs during the upgrade, your data remains secure and accessible. By creating a backup before the upgrade, you can rest assured that all your photos, documents, and other important files are protected from any mishaps.
How to Backup Your Data
Creating a backup of your data doesn't have to be a daunting task. In fact, it's quite simple to do, and the peace of mind it brings is invaluable. Here's a straightforward guide on how to safely back up your files:
- Start by connecting an external hard drive or USB flash drive to your computer.
- Open File Explorer and locate the files you want to back up.
- Select the files or folders you wish to save by clicking on them while holding down the Ctrl key.
- Right-click on the selected files and choose "Copy."
- Navigate to your external drive in File Explorer and right-click in the folder where you want to store your backups. Select "Paste" to transfer the files.
- Wait for the copying process to complete, and voila! Your data is now safely backed up.
Remember, it's always better to be safe than sorry when it comes to your precious files. Taking a few minutes to back up your data before upgrading to Windows 11 can save you a world of trouble in the long run.
The Upgrade Process from Windows 10 to Windows 11
If you're excited about upgrading from Windows 10 to the new and shiny Windows 11, the first thing you need to do is get your hands on the upgrade software. You can download the Windows 11 installation tool from the official Microsoft website. Make sure to save it in a location on your computer where you can easily find it.
Step-by-Step Upgrade Instructions
Now that you have the Windows 11 installation tool ready, it's time to proceed with the upgrade process. Here's a simple step-by-step guide to help you smoothly transition from Windows 10 to Windows 11:
1. Double-click on the Windows 11 installation tool to launch it.
2. Follow the on-screen instructions to begin the upgrade process.
3. Your PC will go through a series of steps, which may include restarting. Be patient and let it complete the process.
4. Once the upgrade is finished, your PC will restart, and you'll be welcomed by the new Windows 11 desktop.
5. Congratulations! You have successfully upgraded from Windows 10 to Windows 11. Take some time to explore the new features and enjoy the fresh look of your operating system.
After the Upgrade: Setting Up Windows 11
So, you've successfully upgraded to Windows 11! Now, it's time to set up your new operating system. The initial setup process is quite straightforward and is designed to help you personalize your Windows experience.

Image courtesy of www.youtube.com via Google Images
When you first start your computer after the upgrade, you'll be guided through a series of prompts to customize your settings. This includes choosing your region, keyboard layout, and connecting to a network. Make sure to select the options that best suit your preferences.
Additionally, you will have the opportunity to create or sign in with a Microsoft account. This account allows you to access various Microsoft services, such as OneDrive and the Microsoft Store, with a single login. You can also choose to use a local account if you prefer not to connect to a Microsoft account.
Exploring New Features
One of the exciting aspects of upgrading to Windows 11 is the introduction of new features that enhance your overall user experience. Let's take a look at some of these notable features:
1. **Redesigned Start Menu:** The Start Menu has been centered and revamped to provide a more streamlined and visually appealing layout.
2. **Snap Layouts and Snap Groups:** This feature allows you to organize your open windows into various layouts for improved multitasking capabilities.
3. **Virtual Desktops:** With virtual desktops, you can create multiple desktops to separate your work or personal tasks, helping you stay organized and focused.
4. **Microsoft Teams Integration:** Windows 11 comes integrated with Microsoft Teams, making it easier to connect and collaborate with colleagues or friends through video calls, chat, and shared files.
5. **Enhanced Gaming Experience:** Gamers will appreciate the improved gaming features in Windows 11, including Auto HDR, DirectStorage, and Xbox Game Pass integration for a more immersive gaming experience.
These are just a few of the exciting new features that Windows 11 has to offer. Take some time to explore and familiarize yourself with the changes to make the most of your upgraded operating system.
Troubleshooting Common Post-Upgrade Issues
After successfully upgrading your Windows PC to the new and exciting Windows 11, you might encounter a few bumps along the way. Here are some common problems that users face post-upgrade and how you can resolve them.
| Step | Description |
|---|---|
| 1 | Check Compatibility |
| 2 | Download Windows Upgrade Assistant |
| 3 | Run Upgrade Assistant |
| 4 | Review Compatibility Report |
| 5 | Backup Your Data |
| 6 | Start Windows 11 Installation |
| 7 | Customize Settings |
| 8 | Enjoy Windows 11! |
How to Resolve Upgrade Problems
If you run into issues like slow performance, incompatible software, or missing features after upgrading to Windows 11, don't panic. Here are a few steps you can take to troubleshoot:
1. Check for Updates: Make sure your system is up to date with the latest patches and fixes from Microsoft. This can often resolve many compatibility issues.
2. Update Drivers: Ensure that all your hardware drivers, like graphics cards, network adapters, and audio devices, are updated to their latest versions compatible with Windows 11.
3. Uninstall Problematic Software: If some of your older software doesn't work well with Windows 11, consider uninstalling them and finding suitable alternatives from the Microsoft Store.
4. Run Troubleshooters: Windows 11 has built-in troubleshooters for common problems. Go to Settings > Update & Security > Troubleshoot and run the appropriate troubleshooter for your issue.
Getting Help with Windows 11
If you find that the troubleshooting steps are not helping or you need more assistance, Microsoft offers support options that can help you get back on track with your Windows 11 experience.
1. Microsoft Support: You can reach out to Microsoft's customer support for personalized help with your Windows 11 upgrade issues. Visit the Microsoft Support website for more information.
2. Online Communities: Joining online forums and communities dedicated to Windows 11 can also be a great way to seek advice and solutions from fellow users who might have faced similar problems.
By following these troubleshooting tips and seeking help when needed, you can ensure a smooth transition to Windows 11 and enjoy the new features and improvements it brings to your PC.
Summary and Final Thoughts
So, you've made it through the exciting journey of upgrading from Windows 10 to the new and improved Windows 11. Let's take a moment to recap all the steps you've taken and what lies ahead in your Windows 11 experience.
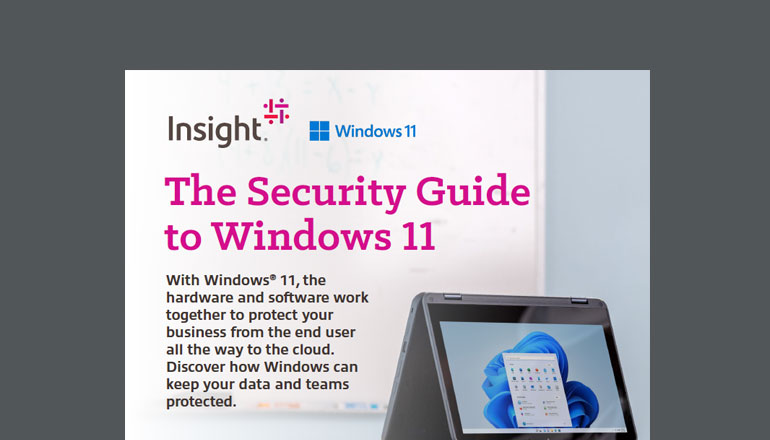
Image courtesy of sg.insight.com via Google Images
Recap of the Upgrade Process
From checking your PC's specifications to backing up your valuable data, you've diligently prepared for the transition to Windows 11. You've followed the step-by-step guide to upgrading, ensuring a smooth and successful installation of the new operating system.
Embracing Windows 11
Now that Windows 11 is up and running on your PC, it's time to explore and enjoy all the exciting features it has to offer. Take your time to customize your settings, get familiar with the new layout, and discover the enhanced functionalities designed to make your computing experience even better.
Looking to the Future
As you continue to use Windows 11, remember that Microsoft is constantly working to improve and update the operating system. Stay tuned for new features, performance enhancements, and security updates that will further enhance your PC experience.
With Windows 11, you're not just upgrading your operating system; you're stepping into a world of innovation and possibilities. Enjoy your new Windows 11 journey!
FAQs
Can my Windows 10 PC run Windows 11?
If you're wondering whether your trusty Windows 10 PC can handle the new Windows 11, you're in luck! Microsoft has provided a handy tool called PC Health Check that allows you to check if your computer meets the necessary requirements to run Windows 11 smoothly. By running this tool, you can quickly assess if your PC is ready for the upgrade.
Is it free to upgrade from Windows 10 to Windows 11?
The good news is that for most Windows 10 users, upgrading to Windows 11 is completely free! Microsoft has made this transition cost-free for eligible devices, which means you can enjoy the new features and benefits of Windows 11 without spending a penny. Just make sure to keep an eye out for any notifications or prompts on your PC to begin the upgrade process.
What should I do if the upgrade fails?
If, unfortunately, your upgrade from Windows 10 to Windows 11 encounters a hiccup along the way, there's no need to panic. First, ensure that your PC meets all the necessary requirements for Windows 11. If it does and the upgrade still fails, you can try troubleshooting the issue by checking for any pending updates, restarting your computer, or seeking assistance from Microsoft's support channels. Remember, help is always available to guide you through any challenges you may encounter during the upgrade process.
Generated by Texta.ai Blog Automation


