Upgrade Your PC: Windows 11 Guide
Unlock the secrets to upgrading your PC to Windows 11 with our in-depth guide - don't miss out on this!
Table of Contents
- Introduction: Welcome to the World of Windows 11!
- Chapter 2: Is Your PC Ready for Windows 11?
- Planning Your Upgrade
- Saving Your Stuff
- Chapter 5: Starting the Upgrade Process
- Chapter 6: After Upgrading
- Chapter 7: Learning About Windows 11 Features
- Chapter 8: Tips & Tricks for Using Windows 11
- Troubleshooting Common Issues
- Conclusion: You're a Windows 11 Pro!
- FAQs: Questions You Might Have
Introduction: Welcome to the World of Windows 11!
Welcome, young tech enthusiasts, to the exciting world of Windows 11! Today, we're going to embark on a journey to explore how you can upgrade your PC to Windows 11 and why this upgrade could offer a fantastic new experience for your computer. Are you ready to dive into the world of the latest Windows operating system?
With Windows 11, your computer is about to undergo a remarkable transformation that will not only refresh its look but also introduce you to a host of cool new features. So, let's get ready to discover what this upgrade has in store for you and your PC!
A Brand New Look
Windows 11 is like giving your computer a trendy makeover. It has a new, stylish look that makes it easier to use and more fun to explore. The icons are sleek, the colors are fresh, and everything feels smooth and modern.
Cool New Features
Imagine if your computer could do even cooler things than it does now. Well, that's what Windows 11 is all about. It comes with amazing new features that can surprise you. From snapping windows side by side to virtual desktops for better multitasking, Windows 11 has some tricks up its sleeve that will make your computer experience even better.
Chapter 2: Is Your PC Ready for Windows 11?
Before you can upgrade to Windows 11, you need to make sure your computer can handle it. But how do you do that? Well, it's not too hard! You can check if your PC is ready by looking at a few things like the processor, memory, and storage space. Don't worry, it's like giving your PC a quick check-up to see if it's healthy enough for the upgrade.
What If You're Not Ready?
If you find out that your PC isn't quite ready for Windows 11, it's okay! There are a few things you can do. You might need to update certain parts of your computer, like adding more memory or storage. Or, if your PC is too old, it might be time to think about getting a new one. Don't feel sad if your PC isn't ready yet - there are always ways to make it work!
Planning Your Upgrade
Upgrading to Windows 11 should be fun, not tough. We'll plan it out together.
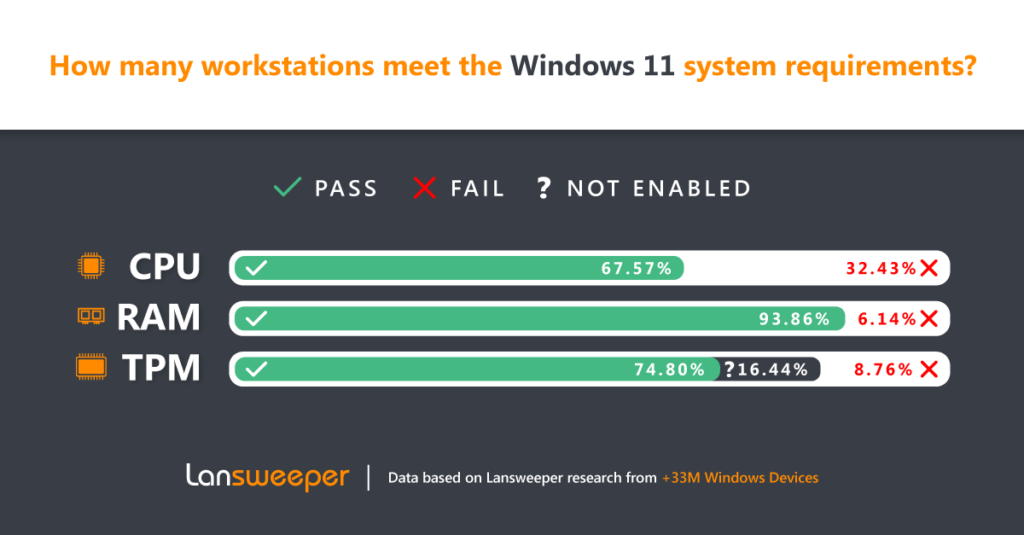
Image courtesy of via Google Images
Choosing the Right Time
Before you start your upgrade, it's essential to pick the best time for it. Make sure you choose a time when you're not busy with homework or in the middle of a super exciting game. That way, you can pay attention to the upgrade process and not rush through it.
Getting Help if Needed
Remember, it's okay to ask for help if you're not sure what to do during the upgrade. If you're stuck or confused about something, don't hesitate to reach out to a grown-up or a tech-savvy friend. They can offer guidance and make the upgrade process smoother for you. It's always better to ask questions and get help than to struggle alone.
Saving Your Stuff
Before you start the exciting journey of upgrading to Windows 11, it's crucial to back up all your important files. Think of it like making a copy of your favorite book just in case something happens to the original. Backing up ensures that even if something does go wrong during the upgrade, you won't lose any of your precious photos, school projects, or games.
What's a Backup?
Imagine a backup as a safety net for your digital stuff. It's like having a superhero that swoops in to save the day when things get tough. When you back up your files, you're essentially creating duplicates of them and storing them in a safe place, separate from your computer. This way, if anything happens to your computer, you can easily retrieve your files from the backup without losing anything.
Chapter 5: Starting the Upgrade Process
So, you’ve decided to upgrade to Windows 11, exciting! Let’s get started with the installation process. Here are some easy steps to follow:
Image courtesy of via Google Images
1. Check for Updates: Make sure your computer has all the latest updates before beginning the installation. This will ensure a smooth upgrade process.
2. Download Windows 11: Go to the official Microsoft website and download the Windows 11 installation files. You’ll need a stable internet connection for this step.
3. Run the Installer: Once the download is complete, run the installer file. Follow the on-screen instructions to begin the installation process.
4. Configuration Settings: During the installation, you’ll be prompted to choose various settings such as language, region, and privacy preferences. Make sure to select the options that suit you best.
During the Upgrade
While your PC is upgrading to Windows 11, you might notice a few things happening:
1. Restarting: Your computer will restart multiple times during the upgrade process. This is normal, so don’t worry if it happens.
2. Installation Progress: You’ll see a progress bar on your screen indicating how far along the installation is. This will give you an idea of how much longer it will take.
3. Patience is Key: Upgrading to Windows 11 can take some time, so it’s essential to be patient and not interrupt the process. Let your computer do its thing, and soon you’ll be enjoying all the new features of Windows 11!
Chapter 6: After Upgrading
Now that you've successfully upgraded to Windows 11, it's time to take a tour of your brand new operating system. Windows 11 has a fresh and sleek design that is both easy to navigate and visually appealing. You'll notice the revamped Start menu, which now sits at the center of your screen, making it easier to access your favorite apps and files. Take a moment to explore the new layout and features, and see all the cool stuff that Windows 11 has to offer.
Setting Things Up
After taking a first look at Windows 11, it's time to customize your experience and set things up just the way you like them. Personalize your desktop with your favorite wallpapers and themes to make your computer truly your own. Adjust settings like display preferences, sound options, and privacy settings to ensure that your Windows 11 experience is tailored to your preferences. By customizing your setup, you can create a space that is both functional and fun to use.
Chapter 7: Learning About Windows 11 Features
Windows 11 brings a whole bunch of new apps and games for you to enjoy. These are like little programs that can do cool things. You might find fun games to play when you need a break or helpful apps to get your homework done faster.
| Component | Minimum Requirement | Recommended |
|---|---|---|
| Processor | 1 gigahertz (GHz) or faster with 2 or more cores on a compatible 64-bit processor or system on a chip (SoC) | 3.0 gigahertz (GHz) or faster with 4 or more cores on a compatible 64-bit processor or SoC |
| RAM | 4 GB | 8 GB |
| Storage | 64 GB or larger storage device | 128 GB SSD or larger storage device |
| Graphics card | DirectX 12 compatible graphics / WDDM 2.x | DirectX 12 compatible graphics / WDDM 2.x |
| Display | 720p display that is greater than 9” diagonally, 8 bits per color channel | 1080p display that is greater than 9” diagonally, 8 bits per color channel |
Image courtesy of via Google Images
Staying Safe
When using your computer, it's essential to stay safe. Windows 11 has some new ways to help keep you protected while you have fun and learn. It's like having a guardian angel watching over you to make sure everything goes smoothly.
Chapter 8: Tips & Tricks for Using Windows 11
Want to navigate through Windows 11 like a pro? Here are some quick keyboard shortcuts that will help you get things done faster:
1. Press Windows key + D to quickly show your desktop and minimize all open windows.
2. Try Windows key + E to open File Explorer in a flash and find your files without clicking around.
3. Use Alt + Tab to switch between open apps seamlessly without clicking on each one.
4. To take a screenshot, press Windows key + Shift + S, select the area you want, and save it wherever you like.
Customizing Your Experience
personalize your Windows 11 to match your style by following these customization tips:
1. Change your desktop background by right-clicking on an empty space, selecting Personalize, and choosing a new wallpaper that makes you smile.
2. Resize and rearrange your Start menu tiles by clicking and dragging them to create your own organized layout.
3. Pin your favorite apps to the taskbar for easy access. Right-click on an app and choose Pin to Taskbar.
4. Adjust your display settings by right-clicking on the desktop, selecting Display Settings, and changing the resolution or brightness to suit your preferences.
Troubleshooting Common Issues
Sometimes, even with all the right steps, things can go a bit wonky during an upgrade. If you notice something not quite right or if you're stuck, don't be afraid to ask for help. You can talk to a parent, teacher, or a friend who knows a lot about computers. They might know just what to do to fix the problem and get things back on track.
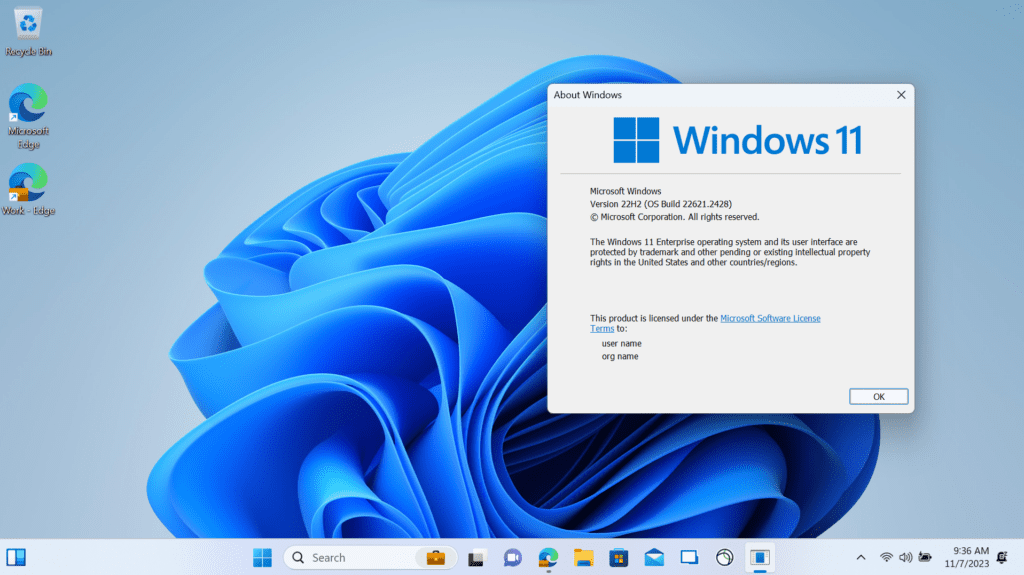
Image courtesy of via Google Images
Resources to Learn More
Don't worry if you can't figure out a solution right away. There are lots of helpful resources online where you can learn more about fixing common PC issues. Websites like Microsoft's support page or tech forums can offer step-by-step guides or troubleshooting tips to help you out. Remember, it's always okay to ask questions and seek out help when you need it!
Conclusion: You're a Windows 11 Pro!
Throughout this guide, we've taken a deep dive into the exciting world of Windows 11 and how it can supercharge your PC experience. By now, you've learned the ins and outs of upgrading to this awesome new operating system, and you're well on your way to becoming a true Windows 11 pro!
What You've Accomplished
By following the step-by-step instructions in this guide, you've successfully transformed your PC into a powerhouse of productivity and fun with Windows 11. You've explored the brand new look and cool features that come with this upgrade, setting yourself up for an incredible Windows experience.
Now, whether you're zipping through tasks with new shortcuts, personalizing your desktop with your favorite wallpapers, or discovering the latest apps and games, you're equipped with the knowledge and skills to make the most out of Windows 11.
Embracing the Windows Experience
With Windows 11, your PC isn't just a tool for getting things done – it's a gateway to creativity, entertainment, and endless possibilities. You've unlocked a whole new world of computing that's designed to make your digital life smoother, more secure, and more enjoyable.
As you continue to explore and master the features of Windows 11, remember that there's always more to learn and discover. Whether it's troubleshooting common issues, customizing your experience, or staying safe online, you're now well-equipped to navigate the exciting landscape of Windows 11 like a pro.
Congratulations on taking this bold step to upgrade your PC to Windows 11. Your journey doesn't end here - it's only just beginning. With your newfound knowledge and skills, the possibilities are endless, and your Windows experience is bound to keep getting better and better!
FAQs: Questions You Might Have
Is upgrading to Windows 11 hard?
Not at all! Upgrading to Windows 11 is actually pretty easy. Just follow the steps we've outlined in this guide, and you'll be enjoying all the new features in no time.
Will I lose all my stuff when I upgrade?
No need to worry about losing your important files and games. Before upgrading, be sure to back up everything on your PC to keep it safe. This way, you won't lose anything during the upgrade process.
What if my PC isn't ready for Windows 11?
If your PC isn't quite ready for Windows 11, don't fret! We've got tips on what you can do to get your computer up to speed and ready for the upgrade. Just follow the suggestions we've provided, and you'll be on your way to experiencing Windows 11.
How long does it take to upgrade to Windows 11?
The time it takes to upgrade to Windows 11 can vary depending on your PC's speed and internet connection. Normally, the installation process can take anywhere from 20 minutes to an hour. Just be patient, and soon you'll be exploring all the cool new features of Windows 11.
What if something goes wrong during the upgrade?
If you encounter any issues during the upgrade process, don't worry! We've included troubleshooting tips in this guide to help you fix common problems that may arise. Remember, it's always okay to ask for help from an adult or someone who knows about computers.


